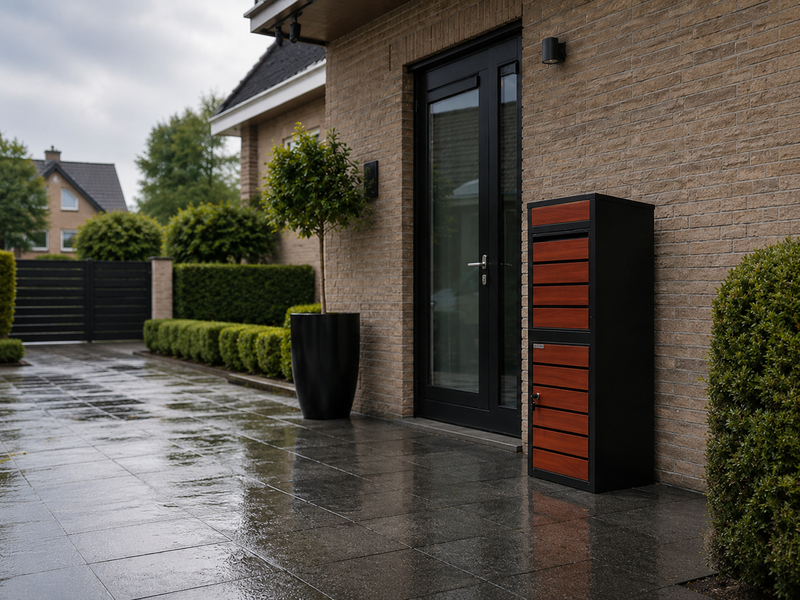
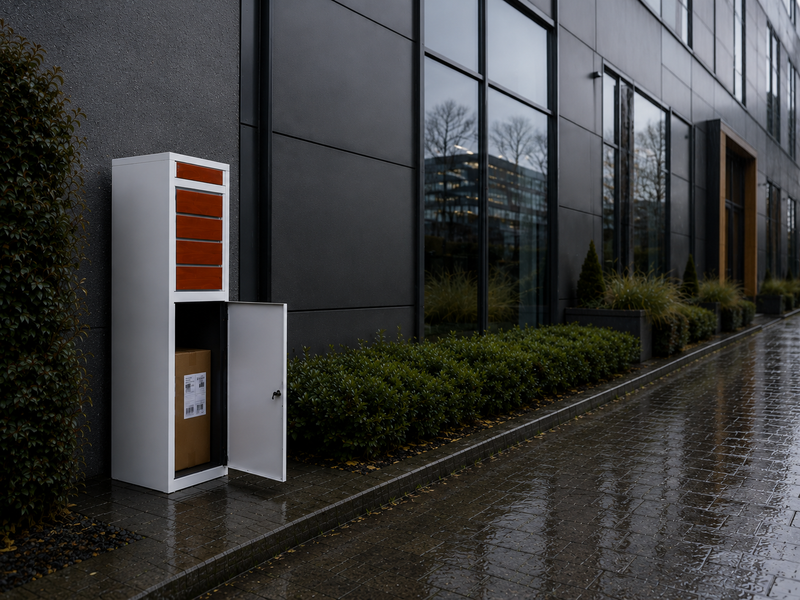
In brief
- Establish the facade type first: the same fischer DuoPower 8x40 holds 62 kg in solid brick, 25 kg in perforated brick and 10 kg in aerated concrete.
- Keep your drill hole within the outer leaf of about 100 mm and do not drill through into the cavity.
- External wall insulation calls for stand-off mounting: fischer TherMax 8, drill diameter 10 mm, 60 mm anchorage.
- Seal every hole with a flexible joint, and on stone with a natural stone sealant.
- Hang the letter slot at 1.1 m, in any case between 0.6 and 1.8 m (Postregeling 2009, the Dutch postal regulation, article 6 paragraph 2).
- Rental, owners' association (VvE) or listed building: ask for permission in writing, the facade is the exterior (article 7:215 paragraph 6 BW, Dutch Civil Code).
A wall-mounted model of 6.5 kg hangs safely on almost any Dutch facade, as long as you choose the wall plug to suit the material and not the weight. The difference between solid and perforated brick is a factor of 2.5 for the same plug, and between solid brick and aerated concrete a factor of 6.
Below, for each facade type, is the fixing the manufacturer specifies, with drill diameter, anchorage depth, minimum edge distance, minimum centre-to-centre spacing and the specified load in kilos or kN. After that: how deep you may drill into a cavity wall, when a fixing in the facade does and does not create a cold bridge, where water runs inside along a screw, at what height the letter slot belongs according to the Postregeling 2009, and what you need to arrange with a landlord, an owners' association or a listed facade. We make parcel letterboxes ourselves in our own factory, so we see what happens on the shop floor and on the service line when a facade is drilled the wrong way. A webshop that resells boxes does not have that information. Where a figure is not public, we say so, with the name of the source where we looked for it. You will find more in-depth articles like this in our Knowledge base.
- 62 kgspecified load fischer DuoPower 8x40 in solid brick
- 10 kgthe same plug, the same size, but in aerated concrete
- 100 mmthickness of a half-brick outer leaf, your drilling limit in a cavity wall
- 1.1 mprescribed height of the letter slot, Postregeling 2009 article 6 paragraph 2

Which facade type do I have and how can I tell?
The question that determines everything is not how heavy your box is, but where the wall plug finds its grip. Dutch facades range from solid handmade brickwork from the nineteenth century to render on 180 mm of insulation from 2024, and the specified load of exactly the same plug varies by a factor of six across them. So start by establishing what you have in front of you.
For the year of construction, the building encyclopaedia by Joost de Vree gives a useful timeline: homes built before 1920 almost never had a cavity wall, between 1930 and 1960 they often did, from 1960 almost always, and from the late seventies that cavity is usually insulated as well. That is an indication and not a certainty. The Rijksdienst voor het Cultureel Erfgoed (RCE, the Dutch Cultural Heritage Agency) shows that the cavity wall is much older than most people think: the oldest Dutch mention dates from 1726, at the Gemeenlandshuis in Diemen, and a drawing by Adriaan Dortsman from 1666 is considered an early example. So architects were already working with cavities in the seventeenth century.
Solid brick without a cavity
With a solid wall there is no hollow space behind the brickwork. In construction terms that is the easiest base, because your drill hole stays in material and you can use the full anchorage depth. In the manufacturer data this falls under the solid brick column, and there fischer specifies 62 kg for the DuoPower 8x40. What we did not find in the sources is a separate technical treatment of old, soft handmade brickwork with weathered joints. Manufacturers calculate with a sound, solid brick. We looked it up at fischer, in the RECA catalogue and in the fischer report made public via Calduran, and none of those documents distinguishes between new and weathered solid brick. So drill into the brick and not into the joint, and test with a trial hole whether the drilling dust comes back powdery or gritty.
Cavity wall without insulation
Tap the facade with a key and listen for hollowness, or look inside through a ventilation grille or open perpend joint. The RCE writes that the cavity in uninsulated cavity walls is generally no more than ten centimetres, while also giving an overall range from a few centimetres to fifty centimetres. Joost de Vree assumes a minimum clear air cavity of 20 mm, which is why the cavity is often set at 40 mm in practice. Those two sources do not contradict each other, they describe different building periods, but the consequence is important: you cannot deduce the cavity width from the year of construction. Measure it if you can see it, and otherwise assume the smallest case.
Cavity wall with insulation
An insulated cavity is denser, but not full. Joost de Vree gives as an example build-up: outer leaf 100 mm, cavity 40 mm, insulation 137 mm and inner leaf 100 mm, 377 mm in total. For an Rc value of 10, about 300 mm of insulation material is needed and the total thickness comes to around 540 mm. For hanging a wall-mounted model, that changes nothing about your method: you stay in the outer leaf of about 100 mm, so here too the insulation thickness is not your problem, your drilling depth is.
Calcium silicate brick
Calcium silicate brick is light in colour, precise in size and often stacked in large elements. In the Netherlands it is common as an inner leaf, but also on the outside in rear facades and storage sheds. The drilling instruction differs by type: the fischer report that Calduran publishes openly prescribes rotary drilling without hammer action for perforated building materials, while hammer drilling is permitted in solid calcium silicate brick. If you hammer-drill into a perforated brick, you break out the internal webs and lose exactly the grip the manufacturer's value is based on.
Aerated concrete
Light grey, porous, visibly full of air bubbles, and you can scratch it with a nail. For the Gasbetonplug GB (aerated concrete plug), fischer gives an application limit of aerated concrete PB2 or PP2 and higher, prescribes rotary drilling, and the plug is then simply driven in with a hammer. In this material the specified value of a universal DuoPower 8x40 drops to 10 kg. That is still well above the weight of a wall-mounted model, but it is the material where you want the most fixing points and the greatest care.
Timber frame with brick slips and cladding on battens
This is the pitfall, because the outer layer looks like brick or solid timber but carries nothing. In its cladding installation instructions of 2 June 2023, Prowood Nederland states literally that heavy objects must not be fixed directly to the cladding: the cladding is not a load-bearing structure. The same instructions give the dimensions of the substructure, and those tell you where to look. The centre-to-centre spacing of the battens is a maximum of 50 cm with visible fixing and a maximum of 40 cm with concealed fixing. The minimum batten size is 21 by 40 or 45 mm, with concealed fixing at least 28 by 68 mm, with 28 mm as the preferred thickness. Behind the cladding there must be a continuous ventilation space of at least 20 mm, and behind vertical cladding always double battens. So use a stud finder to locate the stud or batten, and fix the wall-mounted model onto it, or through the board into the load-bearing structure behind. We found no figure from any manufacturer or institute for the load-bearing capacity of a brick slip layer itself, and that is exactly the reason not to use that layer as a base.
External wall insulation with render
A rendered facade that feels hollow and soft when you knock on it is usually ETICS: insulation boards with a layer of render on top. Buildwise, the Belgian technical institute for construction, distinguishes four fixing methods for ETICS in building detail 1415, ranging from spiral screws in the insulation for light objects to direct anchoring in the underlying substrate for heavy objects. The wording that counts: elements that take significant loads, or that must ensure safety against falling, must be fixed sufficiently deep into the substrate. Buildwise gives no kilogram limits, and the Belgian industry's ETICS Handbook refers to the technical departments of the system manufacturers for that limit. We looked for that limit at Buildwise, in the ETICS Handbook and at Würth, and nobody publishes it as a figure.
| Facade type | How to recognise it | Drilling method according to the manufacturer | Source |
|---|---|---|---|
| Solid brick | Often built before 1920, no hollow sound, no open perpend joints | Hammer drilling permitted in solid brick | Joost de Vree, consulted 26 August 2026 |
| Cavity wall without insulation | Hollow sound, open perpend joints, cavity generally no more than 10 cm | Hammer drilling in the outer leaf, with depth stop | RCE knowledge platform Spouwmuren (cavity walls), consulted 26 August 2026 |
| Cavity wall with insulation | Usually built after the late seventies, total thickness towards 377 mm | Hammer drilling in the outer leaf, with depth stop | Joost de Vree, example build-up 100 plus 40 plus 137 plus 100 mm |
| Solid calcium silicate brick | Light colour, precise size, solid drilling dust | Hammer drilling permitted | fischer report via Calduran, October 2019 |
| Perforated calcium silicate brick or hollow brick | Drill suddenly drops through, drilling dust stops intermittently | Rotary drilling without hammer action | fischer report via Calduran, October 2019 |
| Aerated concrete | Light grey and porous, can be scratched with a nail | Rotary drilling, then drive the plug in with a hammer | fischer Gasbetonplug GB, consulted 26 August 2026 |
| Cladding on battens | Battens or boards, ventilation space of at least 20 mm behind | Not in the cladding, but in the batten or the load-bearing structure | Prowood Nederland, installation instructions 2 June 2023 |
| External wall insulation with render | Soft, hollow sound on a rendered wall | Anchor through the insulation into the substrate | Buildwise building detail 1415, consulted 26 August 2026 |
The column with recognition points is partly practical experience and not a statement from a source: the knock test and scratch test do not appear in any instruction. The drilling methods and dimensions in the right-hand columns do come from the documents named. If you are unsure about the material, first drill a trial hole in a spot you will cover later anyway, and look at the drilling dust.
Why does the same plug hold 62 kg in one facade and 10 kg in another?
This is the figure this whole article revolves around. On its own product page, fischer gives three values for the DuoPower 8x40 that you need to see side by side: 62 kg in solid brick, 25 kg in perforated brick and 10 kg in aerated concrete. One plug, one size, one drill diameter, and still a factor of six difference. The reason is simple: an expansion plug presses against the wall of the drill hole, and in a perforated brick much of that wall is air.
FISCHER DUOPOWER 8X40, SAME PLUG, THREE BASE MATERIALS
Specified values per plug. Source: fischer Nederland, DuoPower product page, consulted 26 August 2026.
There are two things you need to know about those figures. First, these are manufacturer values for a specific, sound base under laboratory conditions. They do not automatically apply to an old, weathered or perforated brick, and no source we found gives a safety factor for this application. Second, a parcel letterbox is not a purely static load. A weight of 6.5 kg is arithmetically about 0.064 kN, and four fixing points with a fischer SX 8x40 in solid calcium silicate brick give nominally 4 times 1.20 kN, so 4.8 kN. That is a margin of well over two orders of magnitude on the weight alone. But the weight of the delivered parcels comes on top, plus a pulling moment because the load hangs at a distance from the facade.
On that bending moment we found only one kind of source data at fischer: the Mzul values of the SXR frame fixing, 7.1 Nm for the SXR 8 and 10.1 Nm for the SXR 10. There is no source that calculates a parcel letterbox, not at fischer, not at Hilti and not at an institute. So the practical rule is not "calculate it" but "spread the load": more fixing points, in the brick and not in the joint, and keeping to the specified edge distance. How to do that with which tools, and which five mistakes are made most often, is covered in assembling a parcel letterbox.
Which wall plug should I use for each facade type?
Below, first the complete fischer table for the DuoPower, because that is the plug most people already have at home and because fischer publishes figures per base material for this series. The base materials fischer lists for the DuoPower are concrete, solid brick, calcium silicate brick, aerated concrete, perforated brick, plasterboard, gypsum fibreboard, natural stone, chipboard and lightweight concrete.
| Size | Drill diameter | Drilling depth | Anchorage depth | Concrete | Solid brick | Perforated brick | Aerated concrete |
|---|---|---|---|---|---|---|---|
| 5x25 | 5 mm | 35 mm | 29 mm | 40 kg | 30 kg | 13 kg | 5 kg |
| 6x30 | 6 mm | 40 mm | 35 mm | 95 kg | 50 kg | 15 kg | 10 kg |
| 6x50 | 6 mm | 60 mm | 55 mm | 165 kg | 55 kg | 17 kg | 15 kg |
| 8x40 | 8 mm | 50 mm | 46 mm | 110 kg | 62 kg | 25 kg | 10 kg |
| 8x65 | 8 mm | 75 mm | 71 mm | 230 kg | 69 kg | 40 kg | 16 kg |
| 10x50 | 10 mm | 60 mm | 58 mm | 215 kg | 120 kg | 25 kg | 20 kg |
| 10x80 | 10 mm | 100 mm | 88 mm | 420 kg | 145 kg | 40 kg | 30 kg |
| 12x60 | 12 mm | 70 mm | 70 mm | 330 kg | 130 kg | 35 kg | 24 kg |
What is not on this fischer product page is the minimum edge distance and the minimum centre-to-centre spacing of the DuoPower. We looked for them on the product page itself and in the RECA and Steenkist catalogue, and neither states them. That is a pity, because on a facade the edge distance is exactly the figure that determines whether you are too close to a window reveal or a corner.
For calcium silicate brick there is a document with complete edge and centre distances: the fischer report that Calduran posted on its site in October 2019. Hilti also publishes a comparable set via the same route, with one figure fischer gives nowhere: the minimum brick thickness. That is exactly the number that determines whether you may anchor into a half-brick outer leaf of 100 mm.
| Product | Manufacturer | Drill diameter | Anchorage depth | Min. edge distance | Min. centre-to-centre | Min. brick thickness | Specified load |
|---|---|---|---|---|---|---|---|
| FIS V injection mortar with FIS A M8 | fischer | 10 mm | 80 mm | 100 mm | 100 mm | Not stated in the report | 4.8 kN tension and 4.8 kN shear |
| FIS V with FIS A M6 | fischer | 8 mm | 60 mm | 100 mm | 80 mm | Not stated in the report | 2.4 kN tension and 2.4 kN shear |
| Safety anchor FH II 10 | fischer | 10 mm | 40 mm | 90 mm | 90 mm | Not stated in the report | 1.3 kN tension |
| Plug SX 8x40 | fischer | 8 mm | 40 mm | Not stated in the report | Not stated in the report | Not stated in the report | 1.20 kN |
| Frame fixing SXR 8 | fischer | 8 mm | 50 mm | 100 mm | 100 to 200 mm | Not stated in the report | Bending moment 7.1 Nm |
| Sleeve anchor TA M8 | fischer | 12 mm | 30 to 40 mm | 150 mm | 300 mm | Not stated in the report | 1.8 to 2.0 kN tension |
| HIT-HY 50 chemical anchor M8 | Hilti | 10 mm | 80 mm | 100 mm | 100 mm | 100 mm | 3.5 kN recommended |
| HLC 10 sleeve anchor M8 | Hilti | 10 mm | 32 mm | 80 mm | 100 mm | 80 mm | 1.5 kN |
| HUS-H 10.5 screw anchor | Hilti | 8 mm | 60 mm | 100 mm | 55 mm | 110 mm | 1.3 kN |
| HUS-S frame screw | Hilti | 6 mm | 40 mm | 60 mm | 60 mm | 80 mm | 1.0 kN |
| DBZ wedge nail | Hilti | 6 mm | 31 mm | 90 mm | 90 mm | 80 mm | 1.1 kN |
All values in this table apply to solid calcium silicate brick and come from the documents Calduran published in October 2019. Put the two manufacturers side by side and something stands out that is hardly explained anywhere. For injection mortar with an M8 threaded rod, fischer requires a minimum edge distance of 100 mm and a centre-to-centre spacing of 100 mm. For the mechanical HLC 10, also M8, Hilti requires an edge distance of only 80 mm but a centre spacing of 100 mm. And Hilti's HUS-H screw anchor has an edge distance of 100 mm with a centre spacing of only 55 mm, exactly the reverse of the fischer ratio. The conclusion matters more than any single figure: edge distance and centre spacing depend on the product, not the material. So always read the technical data sheet or the ETA of the product in your hand, and do not calculate with a rule of thumb from another brand's sheet.
The big table: fixing per facade type
This is the table this article was made for. Where a manufacturer only puts its load table in a separate PDF behind the product page, the cell says so, rather than giving a figure we would have to make up.
| Facade type | Recommended fixing | Drill diameter | Anchorage depth | Min. edge distance | Min. centre-to-centre | Specified load | Source |
|---|---|---|---|---|---|---|---|
| Solid brick | fischer DuoPower 8x40 or 8x65 | 8 mm | 46 mm for 8x40, 71 mm for 8x65 | Not stated on the product page | Not stated on the product page | 62 kg and 69 kg | fischer DuoPower, 26 August 2026 |
| Perforated brick | fischer DuoPower 8x65, rotary drilling | 8 mm | 71 mm | Not stated on the product page | Not stated on the product page | 40 kg | fischer DuoPower, 26 August 2026 |
| Solid calcium silicate brick | fischer SX 8x40 or injection mortar FIS V with FIS A M8 | 8 mm for SX, 10 mm for FIS A M8 | 40 mm for SX, 80 mm for FIS A M8 | 100 mm for FIS V | 100 mm for FIS V | 1.20 kN for SX, 4.8 kN for FIS V | fischer report via Calduran, October 2019 |
| Perforated calcium silicate brick | Hollow masonry plug or injection mortar, rotary drilling without hammer action | 6 to 12 mm depending on size | Drill hole depth 70 to 90 mm | Not stated in the catalogue | Not stated in the catalogue | No figure published for hollow masonry | RECA and Steenkist catalogue, June 2022 |
| Aerated concrete | fischer Gasbetonplug GB 8, rotary drilling | 8 mm | Minimum drill hole depth 60 mm, plug length 50 mm | Not stated on the product page | Not stated on the product page | Only in a separate load table PDF, not on the product page | fischer Gasbetonplug GB, 26 August 2026 |
| Concrete | fischer DuoPower 8x40 | 8 mm | 46 mm | Not stated on the product page | Not stated on the product page | 110 kg | fischer DuoPower, 26 August 2026 |
| External wall insulation with render | fischer TherMax 8, stand-off mounting with M6 thread | 10 mm | 60 mm in the substrate | Not stated on the product page | Not stated on the product page | Only in the downloadable load table, not on the product page | fischer TherMax 8, 26 August 2026 |
| Cladding on battens | On the batten or through the board into the load-bearing structure, never on the cladding | Follows the chosen screw or plug in the load-bearing structure | Follows the chosen screw or plug | Batten spacing maximum 50 cm visible, 40 cm concealed | Batten size at least 21 by 40 or 45 mm | No kg value published for the cladding itself | Prowood Nederland, 2 June 2023 |
| Timber frame with brick slips | Through the brick slip layer into the stud or battens | Follows the chosen screw in the timber | Follows the chosen screw in the timber | No source found | No source found | No manufacturer publishes the load-bearing capacity of a brick slip layer | Not public; we searched at fischer, Prowood and Buildwise |
Two missing cells deserve an explanation, because both matter. The load tables for the fischer TherMax 8 and 10 and for the Gasbetonplug GB are only in separate PDF files behind the product page, and those are not indexed. We looked for them on fischer.nl and via search engines, and they cannot be found publicly. That means nobody, ourselves included, can write down how many kilos a TherMax 8 may carry in external wall insulation. What fischer does do is explicitly name lamps, letterboxes and lightning conductors as example applications for the TherMax 8 and 10, and only outdoor lighting, motion detectors, house numbers and doorbells for the light insulation plug FID II. So at fischer, a letterbox belongs in the TherMax class and not in the insulation plug class. Würth has a product category for fixings on an insulated facade, but the page returned a 403 error for us, so we could not take a single technical detail from it.
How deep may I drill into a cavity wall without hitting the cavity?
The short answer: keep your drill hole well within the outer leaf, and with half-brick masonry that outer leaf is about 100 mm thick. That figure is the limit you measure everything against. Strikingly, not a single manufacturer, ISSO publication (the Dutch building services knowledge institute) or institute document gives a maximum drilling depth for cavity walls in millimetres. We looked at fischer, Hilti, Buildwise and in the public ISSO results, and it is not there. What you can do is work it out yourself from two figures the manufacturers do publish: the thickness of the outer leaf and the required drill hole depth of the plug.
Here is how that works out for the common sizes. The fischer DuoPower 8x40 needs a drill hole of 50 mm and so stays within half of the outer leaf. The 8x65 needs 75 mm and also stays within it, with a 25 mm margin. The 10x80 needs a drill hole of 100 mm, and that is exactly the thickness of a half-brick outer leaf, so that size does not belong in a cavity wall. At Hilti the same limit runs via the minimum brick thickness: for the chemical HIT-HY 50 in M8 it is 100 mm, for M12 already 120 mm and for the largest published size 200 mm. A half-brick outer leaf of 100 mm is therefore only suitable for the smallest anchor sizes. This is a deduction from documented dimensions and not a literal statement from a source, but the calculation is easy to follow and all four figures come from manufacturer data.
- DuoPower 8x40, drill hole 50 mm
- DuoPower 8x65, drill hole 75 mm
- DuoPower 6x30, drill hole 40 mm
- Gasbetonplug GB 8, drill hole 60 mm
- Hilti HUS-S frame screw, anchorage 40 mm
- DuoPower 10x80, drill hole 100 mm
- Hilti HIT-HY 50 in M12, minimum brick thickness 120 mm
- Hilti HIT-HY 50 in the largest size, minimum brick thickness 200 mm
- Any drill without a depth stop or tape marking
Why you leave that cavity alone is best put in the words of the Rijksdienst voor het Cultureel Erfgoed itself. The cavity is not there for the insulation, but for the water.
The cavity prevents rainwater from penetrating. Mortar droppings can create unwanted contact between the inner and outer wall, resulting in moisture penetration.
Rijksdienst voor het Cultureel Erfgoed (Dutch Cultural Heritage Agency), knowledge platform Spouwmuren (cavity walls), consulted 26 August 2026
A mortar dropping (metselbaard) is a bit of leftover mortar that accidentally bridges the cavity. In construction terms, a plug that is too long, or a drilled-through hole you have filled with sealant, is exactly the same thing: a solid material bridge across the cavity along which moisture can reach the inner leaf. That is why you do not solve drilling too deep with more sealant. What we must state explicitly here: there is no primary or institutional Dutch source that says in so many words that water crosses the cavity along a drilled-through plug. The mechanism can be deduced from the RCE statement above, and DIY forums describe it at length, but those cannot be quoted. We checked with the RCE, Buildwise and in the public ISSO results, and the explicit wording is not public. What is certain is the building physics logic of the cavity, and that is reason enough to put a depth stop on your drill.
- Determine the thickness of the outer leaf. Half-brick is about 100 mm. Look in through an open perpend joint or a ventilation grille if you want to be sure.
- Choose the plug whose required drill hole depth stays well below that thickness, so 50 or 75 mm and not 100 mm.
- Put a depth stop on the drill, or stick a strip of tape on the bit at the right depth. This is the step most often skipped in practice.
- Drill into the brick and not into the joint, and keep to the product's specified edge distance, for example 100 mm for fischer FIS V.
- Blow or vacuum out the drill hole before the plug goes in. Drilling dust in the hole costs grip.
If you are not after hanging on the outside but an opening through to the back, that is a different project with different rules. In that case, first read building a parcel letterbox into a wall, gate or fence and the difference between rear retrieval and front retrieval, because then you do drill through the construction and other considerations apply.
Will a parcel letterbox on the wall create a cold bridge?
With a surface-mounted wall model that hangs entirely on the outside: not to any meaningful degree. With a facade with external wall insulation: yes, and then the choice of plug is the answer. With an opening through the entire facade construction: then it is a real building physics question, and nobody in the Netherlands publishes figures on it.
First the definition, because the term cold bridge is often used loosely. The Handboek Bouwfysica (building physics handbook), publicly available via passiefbouwen.nl, defines a thermal bridge as a junction with locally higher heat conduction, with increased energy consumption, reduced comfort and mould growth as risks. The same handbook gives the figures you need to understand when things go wrong. Surface condensation occurs at 100 percent relative humidity, but mould can already develop from 80 percent. So mould becomes an issue before a damp patch does. According to that handbook, the lower limit for the internal surface temperature factor, the f-factor, is 0.65 for homes. One caveat on that last figure: the handbook refers to the Bouwbesluit (the former Dutch Building Decree), and the Bouwbesluit 2012 was replaced on 1 January 2024 by the Besluit bouwwerken leefomgeving under the Omgevingswet. We could not find the article number with that temperature factor in the Bbl, so attribute the 0.65 to the handbook and not to the current legal text.
The psi-value, the linear thermal transmittance in W/mK, gives the extra heat loss at linear thermal bridges. The handbook states explicitly that it cannot be determined by hand and requires finite element calculations. So any website that calculates a psi-value for a letterbox for you is making something up.
Surface-mounted wall model: no opening through the wall
A wall-mounted model hangs with its back plate against the facade. There is no opening through the construction, and the only penetrations of the facade are the plug holes. If that plug stays neatly within the outer leaf, there is no continuous material bridge from outside to inside, and therefore no cold bridge in the sense of the definition above: locally higher heat conduction between inside and outside. That is the sober reason why a surface-mounted model is the calmest project on your entire facade in building physics terms.
External wall insulation: here it does change
With a rendered facade on 100 to 180 mm of insulation, your anchor has to go through that insulation into the substrate, and a metal rod through an insulation layer is by definition a point of higher heat conduction. That is exactly why fischer calls its TherMax a stand-off mounting system for thermally separated fixing in external wall insulation, and why it has a glass-fibre-reinforced cone that cuts its own way through the insulation layer without extra tools. The system covers insulation thicknesses from 45 to 290 mm, in 54 versions within seven product families, with concrete, aerated concrete, solid brick and perforated brick as suitable substrates.
For the size that suits a wall-mounted model, the TherMax 8, fischer publishes these figures: drill diameter 10 mm for all versions, anchorage depth 60 mm in the substrate, thread size M6 and an insulation thickness range of 45 to 180 mm. The drill hole depth increases with the insulation thickness: 120 mm for the 8/60, 140 mm for the 8/80, 160 mm for the 8/100, 180 mm for the 8/120, 200 mm for the 8/140, 220 mm for the 8/160 and 240 mm for the 8/180. That last version therefore drills 240 mm deep, of which 180 mm through the insulation and 60 mm into the substrate. For the load capacity, what was said above applies: it is only in the downloadable load table and not on the product page, and we could not find that table publicly. The manufacturer itself does mention letterboxes as an example application for these sizes, alongside lamps and lightning conductors.
fischer's light insulation plug, the FID II, is a different product with a different purpose: plug length 50 mm, head diameter 18 mm, screw-in depth at least 15 and at most 35 mm, set with a cordless drill and a TX40 bit and screws from 3.5 to 4.5 mm, with fischer recommending pre-drilling from 10 mm render thickness. The applications fischer lists for it are outdoor lighting, motion detectors, house numbers and doorbells. No letterbox. That distinction between two products from the same manufacturer is the clearest signal there is: a facade box belongs on a stand-off mounting system that reaches the substrate.
Through-wall letterbox: the real gap in the Dutch literature
With an opening through the wall, a hole goes through the entire facade construction. That creates not only a thermal break-through but also one that lets air and vapour through. We looked for the building physics requirements that go with it, airtightness, vapour control layer and condensation risk, at the Informatiepunt Leefomgeving, at RVO (the Netherlands Enterprise Agency), at Buildwise and in the public ISSO results. There is no primary or technical Dutch source that describes it. That is a real gap in the professional literature, and it means the distinction between surface-mounted and through-wall can only be made qualitatively. Anyone who presents you with a calculated condensation risk for a through-wall letterbox is basing it on nothing public.
Note. According to the Mavotrans product information sheet, butyl tape with EPDM has an Sd value of 996 m, measured according to DIN EN 1931. That is a vapour-tight layer, not a vapour-retarding one. A vapour-tight layer on the cold outside of a construction is a building physics choice with consequences, and there is no source assessing it for this application. So use such tape for what it is intended for, and not as an emergency fix around an opening through the wall.

How do I stop water running inside along the screws?
Water takes the path of least resistance, and with a facade box that is always the same route: over the top of the box, down along the back plate, and then into the first hole it meets. Every drill hole is a funnel with a screw in it. The only institutional statement we found on this is concise and useful: Buildwise writes in building detail 1415 that all penetrations of the render must be provided with a flexible joint. Flexible is the key word, because a rigid filling breaks loose at the first change in temperature and then you have a gap instead of a seal.
Which sealant may go on stone and which may not
This is a classic mistake you cannot undo. In its own technical FAQ, Soudal explains that normal silicone contains silicone oil that can penetrate porous stone, leaving dark stains along the sealant joint that cannot be removed afterwards. This is called edge zone contamination. Porous types of stone such as granite, marble and travertine have capillary channels, and the oils and plasticisers are drawn into them. Soudal names Silirub MA, Silirub+ S8800, Fix ALL Flexi and Soudaseal 240FC as suitable alternatives, all tested according to ISO 16938-1, the international standard for staining on natural stone. According to Soudal, Silirub+ S8800 and hybrid natural stone sealants perform best at limiting unwanted hydrophobic effects. The manufacturer's application tips are just as practical: mask the stone edges while applying, remove the tape before curing and rinse with clean water.
For the choice between MS polymer and silicone, the trade journal BouwTotaal set the properties side by side in July 2026. MS polymer bonds to many building materials, including timber, concrete, metal, glass, ceramics and plastics, can be painted over, can act as an adhesive and usually needs no primer. Silicones cannot be painted over because paint adheres poorly to them, but they stay flexible, absorb movement well, are moisture-resistant and, in neutral versions, stand up better to UV. On porous substrates and natural stone a primer may be necessary, and the advice is to do an adhesion test beforehand on a critical substrate. That article gives no application temperatures, and Soudal does not give them for these sealants either; we looked for them at both and they are not public for the sealants themselves.
Butyl tape and EPDM outdoors: the temperature and the primer requirement
For butyl tape with EPDM the figures do exist, and they are stricter than most people think. The Mavotrans product information sheet gives an application temperature of +5 to +35 degrees Celsius, and a temperature resistance after application of minus 30 to plus 80 degrees. So you may not apply it on a frosty day, which is exactly the season when people tackle their facade because the weather is dry. The thickness is 1.6 mm, widths run from 100 to 900 mm, air permeability is at most 0.1 cubic metres per square metre per hour at 50 Pa, and the manufacturer describes the UV resistance as very good.
The figure that goes wrong most in practice is the primer requirement. Mavotrans makes primer mandatory on rough concrete, aerated concrete, gypsum, calcium silicate brick, render, bare steel and rough timber. On aluminium, copper, zinc, acrylic glass, smooth glass, plastic profiles and roof coverings it is not needed. Look at that first list again: those are exactly the facade materials a wall-mounted model often hangs on. Without primer the tape does not adhere there, and you end up with a seal that only looks like a seal. The other substrate requirements are dry, firm, clean, dust-free, free of oil and grease and free of other adhesives.
What is not in the instructions, and what we do in practice
Two questions everyone asks have no source. There is no manufacturer, institute or standard that says the top screw holes of a facade box must be sealed and the bottom ones may stay open. And there is no source that prescribes a minimum air gap or spacer thickness behind a facade box in millimetres. We looked at fischer, Hilti, Buildwise, Mavotrans, Soudal and in the public ISSO results, and it is not public. The only related construction logic comes from Prowood, which requires a continuous ventilation space of at least 20 mm behind timber cladding, with openings of at most 10 mm at the top and bottom and at least 5 mm clearance. That is an instruction for cladding and not for letterboxes.
So what we pass on as practical experience, and not as a source: seal the top fixing points, because those are the holes where water comes down along the back plate, and let the bottom points work dry so any moisture has a way out. Work with a flexible joint as Buildwise prescribes, choose a sealant with an ISO 16938-1 result on stone, and only apply butyl tape above plus 5 degrees and on a primed substrate if the material is on the list. How a box itself copes with driving rain and meltwater, separate from the fixing, is covered in watertight and winterproof.
At what height should I hang a parcel letterbox on the wall?
At 1.1 metres, measured from the letter slot to the level where the delivery driver stands. That is not advice but a requirement, and it is in the Postregeling 2009 (the Dutch postal regulation), article 6 paragraph 2. That provision is worded more strictly than most webshops present it, so here is the literal text: the letter slot is fitted horizontally in a vertical surface or in the top surface of the letterbox and sits at 1.1 metres, or in any case no lower than 0.6 metres or higher than 1.8 metres above the level at which the letterbox is operated.
A detail almost every competitor gets wrong: the Besluit brievenbussen (Letterbox Decree) no longer exists. That decree lapsed on 1 April 2009 and its requirements were incorporated into the Postregeling 2009, reference BWBR0025578 on wetten.overheid.nl, valid from 1 April 2009 and published in the Staatscourant (the Dutch Government Gazette) of 2009. If a page still refers to the Besluit brievenbussen as applicable law, its legal basis is more than sixteen years out of date. You can still mention the decree historically, and that is exactly what we do here. The full text is on wetten.overheid.nl.
| Requirement | What the Postregeling 2009 says | Article and paragraph | What PostNL itself publishes |
|---|---|---|---|
| Height of letter slot | 1.1 m, in any case no lower than 0.6 m and no higher than 1.8 m above the operating level | Article 6 paragraph 2 | Ideally 110 cm, at least 60 cm, at most 180 cm from where the delivery driver stands |
| Distance to the road | Reachable within ten metres of the boundary of a road | Article 5 paragraph 4 | Maximum 10 metres from the public road, including council land |
| Accessibility | As close as possible to the carriageway and reachable from the road without obstruction | Article 5 paragraph 2 | Maximum height of steps 2.5 metres measured from the road surface |
| Size of drop opening | At least 265 mm long and 32 mm wide | Article 6 paragraph 3 | At least 26.5 cm long and 3.2 cm high, horizontal |
| Storage space behind the opening | Usable internal width at least 270 mm, the two other dimensions at least 150 mm and 380 mm | Article 6 paragraph 5 | Depth at least 15 cm, width at least 27 cm, height at least 38 cm |
| Shape and colour | Such that confusion with public postboxes of the universal postal service provider is not possible | Article 6 paragraph 1 | Put the house number on or close to the letterbox |
| Safety of the opening | The opening is designed safely to prevent injury | Article 6 paragraph 4 | No obstructive flaps, rubber strips or draught brushes |
PostNL's dimensions and the legal text match exactly: 26.5 by 3.2 cm, 15 by 27 by 38 cm, 60, 110 and 180 cm and the ten metres all appear in both documents. Only the maximum step height of 2.5 metres appears exclusively in the PostNL leaflet and not in the article text we read; so that is an operational rule of the carrier and not a legal requirement. For a wall-mounted model this requirement is more of an advantage than a limitation: you decide the height at which you screw the box on, so you can put the slot exactly at that 1.1 metres. With a freestanding model the height is already set in the design: the Style is 1000 mm tall, the Home 1020 mm and the Plus 1120 mm, which puts the drop opening within the 0.6 to 1.8 metre range. All requirements for Dutch letterboxes are listed in letterbox requirements in the Netherlands.
May I hang a parcel letterbox on the facade of a rented home?
Ask your landlord in writing, and do not assume you are entitled to a yes. The facade is the exterior of the rented property, and that is precisely where the legislator removed the tenant's protection. This is in article 7:215 of the Burgerlijk Wetboek (the Dutch Civil Code), Book 7, reference BWBR0005290 on wetten.overheid.nl.
Paragraph 1 states that the tenant may not change the layout or form of the rented property without the landlord's written permission, unless the changes can be undone and removed at the end of the tenancy without significant cost. Paragraph 2 gives the well-known rule for residential property: the landlord grants permission within eight weeks in any case if the change does not harm the property's lettability and does not reduce its value. Paragraph 3 opens the way to court in the event of a refusal, and states that the owner, usufructuary, leaseholder or mortgagee must also be summoned if the landlord is not that party. Paragraph 4 says that the court will in any case grant the claim if the landlord should have given permission under paragraph 2, and in other cases only if the change is necessary for efficient use or improves the enjoyment of the home and there are no serious objections. Paragraph 5 lets the court attach conditions to the authorisation and, at the landlord's request, increase the rent.
And then paragraph 6, the paragraph that decides everything for this subject: the preceding paragraphs cannot be deviated from to the tenant's detriment, unless it concerns the exterior of rented residential property. A parcel letterbox on the facade is a change to the exterior. The semi-mandatory protection therefore falls away, the landlord may prohibit it in the contract, and you cannot rely on the eight-week period of paragraph 2. The Dutch legal portal Huurgeschil.nl puts it the same way: for residential property, article 7:215 BW is not semi-mandatory law with regard to the exterior, and the landlord can prevent changes to the exterior. For commercial property it is exactly the other way round, because there the article does apply as semi-mandatory law and contractual restrictions are invalid.
That does not mean there is nothing you can do. According to Huurgeschil.nl, a court tests against nuisance, safety, conflict with legal requirements and invasion of third parties' privacy, with security cameras as an example. A parcel letterbox touches none of those four. In addition, a court can decide afterwards that a formally required permission should have been given anyway, especially if it is merely a formality. The tenants' organisation !WOON adds that no permission is needed for tenant-installed alterations that the landlord can undo at the end of the tenancy without significant cost, that the landlord must agree within eight weeks as long as value and lettability do not decrease, and that you may remove them at the end of the tenancy as long as you hand the home back in good condition. If the alteration stays and the landlord benefits from it, compensation can be requested. That !WOON page, incidentally, only covers interior alterations; it contains no specific rules for the exterior.
What we could not find, and that matters for this subject: there are no rulings or publications from the Huurcommissie (the Dutch Rent Tribunal) specifically about fixings to the external facade. The Huurcommissie mainly handles rent and maintenance disputes. Nor did we find a publication from the Woonbond (the Dutch tenants' union) on changes to the exterior. Anyone who tells you there is established case law on letterboxes on rented facades cannot point to it.
So the practical route is short: email your landlord with a photo of the facade, the dimensions of the box and a note that you will fill the holes when you leave and hand back the facade in good condition. If you would rather not touch the facade at all, a freestanding model in the garden is the way around it, and that is covered in freestanding installation.
What do I need to arrange with an owners' association, a listed building or a protected townscape?
In an apartment building, the facade is not yours. Article 9 paragraph 1 of the Modelreglement 1992 (the Dutch model regulations for owners' associations) explicitly counts the external facades, including the window frames with glass and the doors in the external facade, as common parts. And article 13 paragraph 2 of the same regulations states that fitting name plates, advertising signs, hanging signs, awnings, flags, banners, flower boxes, floodlights and in general protruding objects on the outside is only permitted with the permission of the meeting. A parcel letterbox is a protruding object on the outside and therefore falls under that permission requirement.
Important here: there are several model regulations, from 1972, 1983, 1992, 2006 and 2017, and the article numbers differ per version. The numbers above apply to the Modelreglement 1992. We could not verify which number the facade as a common part has in the 2006 and 2017 versions, so check your own deed of division to see which version has been declared applicable. That is in the first articles of the deed, which you can request from the Kadaster (the Dutch Land Registry). Put the item on the agenda of the next meeting and bring the dimensions and a photo; in practice it is a five-minute agenda item.
National listed building (rijksmonument)
For a national listed building, the permit question takes precedence over everything. The Informatiepunt Leefomgeving (IPLO, the Dutch government's environmental information point) writes that the national rules are in chapter 13 of the Besluit activiteiten leefomgeving (Bal) and that most activities on a national listed building require an environmental permit. According to article 13.11 Bal, only ordinary maintenance that preserves the monumental values and does not change detailing, colour and type of material is permit-free, plus changes to the interior of non-monumental parts. Article 13.12 Bal prohibits damaging, destroying or neglecting a national listed building, and article 13.7 Bal obliges anyone carrying out an activity on a listed building to prevent damage or destruction. The assessment rules for the permit are in article 8.80 of the Besluit kwaliteit leefomgeving: prevent disfigurement and demolition, no relocation unless necessary, and promote use with respect for the heritage values.
A box on a listed facade changes colour, detailing and material appearance and requires holes in historic brickwork. In our reading, that is not ordinary maintenance within the meaning of article 13.11 Bal, and so in principle requires a permit. Note that this is a line of reasoning and not a quotation: the IPLO page says nothing about letterboxes. The page is on iplo.nl.
Protected townscape or village view
Monumenten.nl writes that municipal, provincial or national listed buildings in a protected townscape or village view fall under the rules for national listed buildings. There, only small and routine maintenance work is permit-free where material, colour, shape, detailing and profiling do not change, with examples such as sanding and painting in the same colour, replacing a broken pane or roof tile with the same type and local repairs to frames and render. If you have a non-listed building within a protected townscape, that is a different situation: then municipal rules from the environmental plan and the design guidelines (welstandsnota) apply. Those differ per municipality and cannot be set out generically, so we cannot give a national figure or article for them. If in doubt, call your local council, and it takes five minutes. Monumenten.nl advises exactly that too.
What does it cost to repair the facade if the box has to come off again?
Here two public price sources diverge so far that you need to set them side by side rather than choose one. Werkspot, which publishes its own price data and updated its page on 6 June 2025, arrives at €12.50 to €30 per replaced brick. Gevelpro, a specialist company that published on 7 April 2025, arrives at €2 per brick. That is a difference of a factor of 6 to 15 for exactly the same job. Presumably Gevelpro only counts materials and Werkspot materials plus labour, but neither source says so, so we give both figures with source and date.
| Work | Werkspot, updated 6 June 2025 | Gevelpro, published 7 April 2025 | What the difference means |
|---|---|---|---|
| Replacing a brick | €12.50 to €30 per brick | €2 per brick | Factor of 6 to 15 difference, neither source explains what is included in the price |
| Repointing | €10 to €100 per m2 | On average €30 to €60 per m2 | Gevelpro gives a narrower band within Werkspot's wide range |
| Repairing cracks | €50 to €80 per m2, or €50 to €100 per metre | Not published | Only Werkspot gives a price per linear metre of crack |
| Raking out and repointing | Not published as a separate item | €48 to €130 per m2 | Gevelpro does list cutting out and raking out separately |
| Labour and call-out | €30 to €50 per hour, call-out charge up to €50 per visit | Not published separately | This is the item that may explain the difference per brick |
| Scaffolding and additional items | Scaffolding hire €150 to €300 per week, waste removal about €100, urgency surcharge 20 to 50 percent | Indicative total for a terraced house of 50 to 60 m2: €1,500 to €3,600 | For a few plug holes at eye level, scaffolding plays no role |
What neither source gives is the price of neatly filling one or a few plug holes of 8 to 10 mm. We looked at Werkspot, at Gevelpro and in the published price lists of facade companies, and the smallest unit anyone publishes is per brick or per square metre. So calculate with the labour item of €30 to €50 per hour plus any call-out charge up to €50 if you have a professional do it, and bear in mind that a mortar colour on a weathered facade never matches exactly straight away. For completeness, Werkspot also lists the material prices that go with a larger repair: brick €35 to €70 per m2, cement €5 to €15 per m2, insulation material €15 to €50 per m2, and brick slip cladding €150 to €200 per m2.
Which BunnyBox model suits my facade?
The wall-mounted model in our range is the Compact. It takes parcels up to 300 by 200 by 200 mm, has external dimensions of 365 by 250 by 450 mm and weighs 6.5 kg packed. It takes nine phone boxes. The Compact is also the only model in our range that arrives pre-assembled: you do not have to put a self-assembly kit together at the facade, just align the box and fix it. If you are working on a ladder or a stepladder, that is the difference between a job of half a morning and a job of half an hour. View the BunnyBox Compact for the colours and versions.
All series are made of 0.7 mm galvanised sheet steel with Qualicoat Class 2 powder coating with zinc phosphate pretreatment, and have a door with a key lock and two keys and a flap on top where the delivery driver puts the parcel in. The Compact also has a separate slot for post, with a compartment behind it. The colours are RAL 9005 black, RAL 9010 white, RAL 7036 platinum grey and RAL 7016 anthracite, and there are combinations with dark teak and light oak. For a facade, that choice of colour is more than cosmetic: on a light calcium silicate brick facade, anthracite stands out less than black, and with timber cladding a teak combination matches what is already there.
If you regularly order boxes larger than 300 by 200 by 200 mm, a freestanding model is the answer, and then no drill touches your facade at all. The Style takes parcels up to 350 by 320 by 200 mm with external dimensions of 380 by 365 by 1000 mm and has a wood-effect front with a separate letter slot. The BunnyBox Home goes up to 370 by 320 by 210 mm at 410 by 380 by 1020 mm. The BunnyBox Plus is the largest, with parcels up to 450 by 320 by 210 mm, external dimensions of 500 by 370 by 1120 mm and, as the only one, truly separate compartments for post and parcels. The parcel compartment of a freestanding model is almost half a metre tall, so a week of orders fits inside without you having to empty it. In figures: the Home and Style take 14 book packages, the Plus 18, and every freestanding model takes four shoeboxes. As for phone boxes, 40 fit in the Home and the Style and 42 in the Plus.
| Model | Type | Parcels up to | External dimensions | Weight packed | Post and parcels | Assembly |
|---|---|---|---|---|---|---|
| Compact | Wall-mounted model | 300 x 200 x 200 mm | 365 x 250 x 450 mm | 6.5 kg | Separate slot, 1 compartment | Supplied pre-assembled |
| Style | Standing post with wood-effect front | 350 x 320 x 200 mm | 380 x 365 x 1000 mm | 17.0 kg | Separate slot, 1 compartment | Self-assembly kit |
| Home | Freestanding | 370 x 320 x 210 mm | 410 x 380 x 1020 mm | 16.0 kg | 1 compartment | Self-assembly kit |
| Plus | Tall standing post | 450 x 320 x 210 mm | 500 x 370 x 1120 mm | 20.0 kg | Separate compartments | Self-assembly kit |
Still undecided between wall-mounted and freestanding? Which BunnyBox suits me helps you on your way in a few questions. Want to know why a delivery driver sometimes walks past a box? See why your delivery driver skips your parcel letterbox. And if you are still working out the size, which size parcel letterbox do I need is the place to start. Always someone home with a BunnyBox.


View the models
Frequently asked questions about a wall-mounted model on the facade
How do I hang a parcel letterbox on a cavity wall?
Only in the outer leaf, which is about 100 mm thick with half-brick masonry. Choose a plug whose required drill hole depth stays well below that, so a fischer DuoPower 8x40 with 50 mm or an 8x65 with 75 mm, and not the 10x80 that needs 100 mm. Put a depth stop or a strip of tape on the drill before you start.
Which wall plug do I use for a letterbox on an external wall?
That depends entirely on the material. For the DuoPower 8x40, fischer gives 62 kg in solid brick, 25 kg in perforated brick and 10 kg in aerated concrete. Aerated concrete calls for a Gasbetonplug GB 8 with an 8 mm drill diameter and a drill hole of at least 60 mm. In solid calcium silicate brick, fischer specifies 1.20 kN for the SX 8x40, and 4.8 kN for injection mortar FIS V with a FIS A M8 at an edge distance of 100 mm.
May I drill through the cavity?
No, and it is not just a question of grip. The Rijksdienst voor het Cultureel Erfgoed (the Dutch Cultural Heritage Agency) writes that the cavity prevents rainwater from penetrating and that unwanted contact between the inner and outer leaf leads to moisture penetration. A plug that is too long is, in construction terms, the same as a mortar dropping: a solid bridge across the cavity. More sealant in the hole does not solve that, because the bridge itself is the problem.
Will a letterbox on the facade create a cold bridge?
With a surface-mounted wall model that hangs entirely on the outside and whose plugs stay in the outer leaf, there is no continuous material bridge from outside to inside. With a facade with external wall insulation, the anchor does go through the insulation, and that calls for thermally separated stand-off mounting: the fischer TherMax 8 with a 10 mm drill diameter and 60 mm anchorage in the substrate.
Which sealant do I use around a letterbox on brick?
Not ordinary silicone. Soudal explains that normal silicone contains silicone oil that soaks into porous stone and leaves dark stains along the joint that cannot be removed afterwards. Use a natural stone sealant or hybrid sealant tested according to ISO 16938-1, for example Silirub MA, Silirub+ S8800, Fix ALL Flexi or Soudaseal 240FC, and mask the stone edges while applying.
At what height should my letterbox hang?
At 1.1 metres, measured from the letter slot to the level where the delivery driver stands, and in any case no lower than 0.6 and no higher than 1.8 metres. That is in the Postregeling 2009 (the Dutch postal regulation), article 6 paragraph 2. The box must also be reachable within ten metres of the boundary of a road, according to article 5 paragraph 4.
May I hang a parcel letterbox on the facade as a tenant?
Ask in writing. The facade is the exterior, and article 7:215 paragraph 6 BW (Dutch Civil Code) states that the preceding paragraphs may not be deviated from to the tenant's detriment, unless it concerns the exterior of rented residential property. As a result, the eight-week period of paragraph 2 does not apply here and a landlord may prohibit this in the contract. For commercial property it is the other way round: there the article is semi-mandatory.
Do I need permission from the owners' association (VvE)?
Yes, in most cases. Article 9 paragraph 1 of the Modelreglement 1992 counts the external facades as common parts, and article 13 paragraph 2 requires the meeting's permission for protruding objects on the outside. Check your deed of division to see which model regulations apply, because the article numbers differ per version.
Can I hang a wall-mounted model on cladding or render?
Not on the cladding itself. Prowood writes that cladding is not a load-bearing structure and that heavy objects must not be fixed directly to the cladding. Find the batten or stud behind it, with a centre-to-centre spacing of at most 50 cm with visible fixing. With render on insulation, your fixing anchors in the substrate beneath the insulation, as Buildwise prescribes for heavier objects in building detail 1415.
What does it cost to repair the holes if the box has to come off again?
Nobody publishes a price for a single plug hole; the smallest unit sources give is per brick or per square metre. Werkspot gives €12.50 to €30 per replaced brick and €30 to €50 per hour of labour, Gevelpro gives €2 per brick. Neither source explains that difference of a factor of 6 to 15.
Note. Last checked on 26 August 2026. We review this page twice a year, and immediately if any of the sources below changes.
Sources used: Postregeling 2009, BWBR0025578 on wetten.overheid.nl, valid from 1 April 2009, article 5 paragraphs 2 and 4 and article 6 paragraphs 1 to 5. Burgerlijk Wetboek Book 7, BWBR0005290, article 7:215 paragraphs 1 to 6. Besluit activiteiten leefomgeving, chapter 13, articles 13.7, 13.11 and 13.12, and Besluit kwaliteit leefomgeving article 8.80, via the Informatiepunt Leefomgeving, consulted 26 August 2026. PostNL, leaflet Uw brievenbus, CM003, 2017 edition. fischer Nederland, product pages DuoPower, Gasbetonplug GB, TherMax 8 and FID II, consulted 26 August 2026. fischer report Bevestigingen voor kalkzandsteen and the Hilti document on anchoring in calcium silicate brick, both published via Calduran in October 2019. RECA and Steenkist, catalogue Pluggen en ankers, June 2022. Rijksdienst voor het Cultureel Erfgoed, knowledge platform Spouwmuren, consulted 26 August 2026. Joost de Vree, building encyclopaedia, consulted 26 August 2026. Prowood Nederland, Verwerking gevelbekleding, 2 June 2023. Buildwise, building detail 1415, and the ETICS Handbook. Handboek Bouwfysica, via passiefbouwen.nl, February 2020. Mavotrans, product information sheet Butyltape-EPDM. Soudal, technical FAQ on silicone on natural stone, consulted 26 August 2026. BouwTotaal, MS polymer versus silicone, July 2026. Huurgeschil.nl and !WOON, consulted 26 August 2026. VvE.nl, knowledge base Modelreglement 1992. Monumenten.nl on permit-free work. Werkspot, facade repair price page, updated 6 June 2025. Gevelpro, Kosten gevel voegen 2025, 7 April 2025.
Not public, though we looked: the load tables of the fischer TherMax 8 and 10, the Gasbetonplug GB and the FID II in kilos or kN, the edge distance and centre-to-centre spacing of the DuoPower, Würth's technical data for fixing to an insulated facade, a manufacturer or institute source with a maximum drilling depth for cavity walls in millimetres, a building physics source on through-wall letterboxes, an instruction on top versus bottom screw holes, a minimum air gap behind a facade box, the kilogram limit between light and heavy objects with external wall insulation, and the price of filling a single plug hole.