In brief
- Tools: hammer drill of 400 to 500 watts, rotary hammer for concrete, masonry bit, long spirit level, ratchet, sealant gun.
- Check three things beforehand: the wall material, the flatness and the height of the slot.
- The wall plug follows the base: DuoPower in brick, Gasbetonplug GB 8 in aerated concrete, TherMax through insulation.
- Würth gives 3.0 to 5.0 Nm for a 4.8 mm self-drilling screw.
- Injection mortar cures in 45 minutes at +20 degrees and in 7 hours at 10 degrees below zero.
- Sealant and adhesive no longer cure below +5 degrees.
- The letter slot belongs at 1.1 metres, between 0.6 and 1.8 metres (Postregeling 2009, the Dutch postal regulation, article 6 paragraph 2).
Assembling a parcel letterbox is an afternoon's job, and it almost never goes wrong in the drilling but in the choices before it: the wrong wall plug, a wall that is not flat and a screw turned half a turn too far. Choose the plug to suit the base, mount it stress-free with shims and stick to the screw manufacturer's tightening torques, and the box will still be straight in ten years.
Below is the complete process: the tools you really need, a table of fixings per base with fischer's own drill diameters and drilling depths, Würth's tightening torques, assembly in ten steps, the five biggest mistakes with sources, what frost does to your mortar and sealant, and what the Postregeling 2009 literally says about the height. We make our parcel letterboxes ourselves in our own factory, so we know how 0.7 mm galvanised sheet steel behaves under a screw head and why a body starts to jam if you pull it onto a bulging wall. That is exactly the kind of information a webshop that resells boxes cannot give.
- 1.1 mPrescribed height of the letter slot above the operating level, Postregeling 2009 article 6 paragraph 2
- 10 mMaximum distance from the road boundary within which the box must be reachable, article 5 paragraph 4
- 7 hoursCuring time of Hilti HIT-HY 200-A at a base material temperature of 10 degrees below zero
- 5 °CLimit below which adhesives and sealants no longer cure or dry, according to Bison

What tools do I need to assemble a parcel letterbox?
The short answer: a machine that gets through your base material, a bit that suits the material, something to level with and something to tighten with control. The rest is comfort. The pitfall lies in the last two: many people drill a perfectly good hole with a perfectly good machine and then ruin the job by using a hammer drill as a screwdriver.
In its own DIY guide (bosch-diy.com, consulted 26 August 2026), Bosch explains why that difference exists. A hammer drill works with a mechanical impact: limited force, high frequency, typically 30,000 to 50,000 blows per minute. A rotary hammer works pneumatically and delivers fewer but harder blows. An important detail Bosch mentions explicitly: with a rotary hammer, the impact force does not depend on how hard you push the machine, with a hammer drill it does. That explains why two people with the same hammer drill in the same concrete get very different results.
According to Bosch, a mains hammer drill of 400 to 500 watts or more is sufficient for this kind of work, and for cordless tools 18 volts is recommended over 12 volts for extra power. Bosch calls a rotary hammer the ultimate choice for particularly hard materials such as hard concrete, while a hammer drill is better for precise holes in softer materials. For driving the screws, use a cordless screwdriver: it has no hammer function and, according to Bosch, is considerably handier and more precise than a hammer drill.
Two cases where the hammer function must be off, both from Bosch: with tiles, because otherwise the tile breaks, and with softer materials such as aerated concrete. fischer confirms the latter on its own product page for the Gasbetonplug GB 8: the advice there is to drill the hole in rotary mode, so without hammer action.
The tool list with the reasoning behind it
| Tools | What you use it for | Why a cheap alternative works against you here |
|---|---|---|
| Hammer drill, 400 to 500 watts | Holes in brick, calcium silicate brick and render | The impact force depends on how hard you push (Bosch), so with a light machine at arm's length above your head you lose exactly that pushing power |
| Rotary hammer | Holes in hard concrete and in a concrete threshold or footing | Pneumatic impact works independently of your pushing force; according to Bosch it is the right machine for hard concrete |
| Cordless screwdriver, 18 volts | Driving and tightening screws | A hammer drill has no fine torque control; according to Bosch a cordless screwdriver is handier and more precise for this |
| Masonry bit with carbide tip | All holes in masonry and concrete | A worn or too thin bit makes a hole wider than the plug size, and then the plug no longer reaches the specified value |
| Metal drill bit, HSS | Extra holes in the body or in a mounting plate | We found no manufacturer source that literally prohibits using a metal bit in stone; that it drills badly the other way round you will notice within two seconds from the swarf |
| Spirit level, as long as will fit, plus an angle level | Aligning the body horizontally and vertically | A 20 cm spirit level measures the top of your box, not the box. No manufacturer publishes a recommended minimum length, so the rule of thumb applies: longer than the part you are aligning |
| Torque wrench or adjustable screwdriver | Bringing bolts and self-drilling screws to torque | Würth gives a range of 6.8 to 28.7 Nm for an M8 in stainless steel depending on friction; by feel you can easily be a factor of four out |
| Ratchet and spanner set, screwdrivers | Reaching nuts on the inside of the body | In a closed body you cannot turn a loose spanner round; a ratchet with a short head saves the most time |
| Rivet gun, range 2.4 to 5.0 mm | Setting blind rivets of 3.2, 4.0 and 4.8 mm | A rivet gun with too small a range will not break off the 4.8 mm rivet; Rapid stocks the sizes 3.2, 4.0 and 4.8 mm as standard |
| Sealant gun with outdoor sealant | Sealing the opening and the top edge | Bostik gives +5 degrees as the minimum application temperature, so half a tube from a cold shed works against you |
| Vacuum cleaner or blower bulb | Clearing out drill holes before you insert the plug | Not vacuuming out drill holes is on Woonvrienden.nl's list of common mistakes; drilling dust acts as a lubricant between plug and brick |
| Shims or plastic spacer rings | Stress-free mounting on a wall that is not flat | The Post-Point installation manual warns that otherwise the body comes under stress and the door starts to catch |
| Safety glasses and work gloves | Drilling into stone above your head | Drilling dust falls straight down into your eyes; this is also on Woonvrienden.nl's tool list |
What else turns up in those lists is useful but not critical. Woonvrienden.nl also mentions a tape measure, a pencil or marker and a rubber mallet. Doika.be wrote a shorter list on 2 January 2026: drill with masonry bit, plugs and bolts for outdoor use, spanner or ratchet, tape measure and spirit level. Doika.nl came to the minimum on 16 October 2022: drill, tape measure, pencil and spirit level. None of these sources gives dimensions in millimetres, so use them as a checklist and not as a specification.
One more point about the torque wrench that you will not read anywhere else: we found not a single parcel letterbox manufacturer that specifies a tightening torque in Nm for the mounting screws of a letterbox. That does not mean the torque does not matter, it means you have to fall back on the values from the screw and bolt manufacturer. You will find those further on in this article.
Which wall plug goes with which base?
This is the most important decision of the whole job, and it takes thirty seconds if you know what you are looking at. Scratch with a screwdriver in a hidden corner: red and hard is brick, yellowish-white and soft with grains is calcium silicate brick, white and light with open bubbles is aerated concrete, grey and rock-hard is concrete, and a hollow sound with plaster underneath is a stud wall or timber frame.
Then you choose the plug. Below are the values as fischer, Rawlplug and Post-Point publish them themselves, consulted on 26 August 2026. An important caveat for every figure in the load column: a plug value by definition depends on the base and applies according to the manufacturer's load table. The values fischer gives on the DuoPower overview page are the maximum load in concrete. In brick, hollow masonry or aerated concrete that value is lower, and fischer does not publish it per base on the product page.
| Base | Wall plug or anchor | Drill diameter | Drill hole depth | Specified load | Source |
|---|---|---|---|---|---|
| Concrete, light fixing | fischer DuoPower 6 x 30 | 6 mm | 40 mm | 95 kg in concrete | fischer.nl, 26 August 2026 |
| Concrete, standard facade fixing | fischer DuoPower 8 x 40 | 8 mm | 50 mm | 110 kg in concrete | fischer.nl, 26 August 2026 |
| Concrete, heavy | fischer DuoPower 10 x 80 | 10 mm | 100 mm | 420 kg in concrete | fischer.nl, 26 August 2026 |
| Solid brick and calcium silicate brick | fischer DuoPower 8 x 40 or 10 x 50 | 8 or 10 mm | 50 or 60 mm | 110 and 215 kg, measured in concrete; not published per type of brick | fischer.nl, 26 August 2026 |
| Perforated brick and hollow blocks | fischer DuoPower 8 x 65 | 8 mm | 75 mm | 230 kg in concrete; fischer calls this length particularly suitable for perforated material | fischer.nl, 26 August 2026 |
| Thick render layer to bridge | fischer DuoPower 6 x 50 | 6 mm | 60 mm | 165 kg in concrete | fischer.nl, 26 August 2026 |
| Aerated concrete, unrendered | fischer Gasbetonplug GB 8, plug length 50 mm, screw 5 mm | 8 mm, rotary drilling | at least 60 mm | Not on the product page; fischer refers to a separate load table | fischer.nl, 26 August 2026 |
| Heavier facade fixing, push-through installation | fischer SXR 10 x 80 T frame fixing, clamping length 50 mm | 10 mm | 90 mm | Not on the product page; assessment ETA-07/0121, DoP 0329, approved from concrete C12/15 | fischer.nl, 26 August 2026 |
| Plasterboard, stud wall, cavity | fischer DuoTec 10 toggle plug, screw 4.5 to 5.0 mm | 10 mm | Board thickness 9.5 to 55 mm, cavity at least 40 mm deep | Not stated on the manufacturer's page | fischer.nl, 26 August 2026 |
| External insulation of 45 to 180 mm | fischer TherMax 8/160 M6, anchorage 60 mm in the load-bearing layer | 10 mm | 220 mm | Only in separate load tables; fischer literally names letterboxes as an application | fischer.be, 26 August 2026 |
| Insulation board, light attachment | fischer FID 50 K or FID 90 K | 4.5 to 5.0 mm (FID 50 K) or 6.0 mm (FID 90 K) | Screw-in depth at most 35 mm or 80 mm | Only in separate load tables; fischer names letterboxes as an example | fischer.nl, 26 August 2026 |
| Universal, second manufacturer | Rawlplug UNO 6 x 28 or UNO 8 x 32 with screw 4.5 x 40 | Not on the product page | Not on the product page | Not on the product page; approvals KOT-2022/2086 and KDWU-2022-2086-UNO | rawlplug.com, 26 August 2026 |
| What a letterbox manufacturer itself specifies | Supplied plug and screw | 6 mm | about 60 mm | Not stated | Post-Point, Montagehandleiding brievenbussen, 26 August 2026 |
Two things stand out when you compare that table with practice. First: the universal plug in every DIY store tray is not meant as universal for aerated concrete. fischer makes its own plug for that, the Gasbetonplug GB, approved for aerated concrete PB2, PB3 and PB4, or AAC2, AAC3 and AAC4, with the explicit application of unrendered aerated concrete and the instruction to drill in rotary mode. When a manufacturer makes a separate product for a base material, that is the strongest signal that the standard plug is not the first choice there.
Second: with porous and hollow material, length matters more than diameter. fischer writes about the longer DuoPower versions 6 x 50, 8 x 65 and 10 x 80 that they are particularly suitable for fixings in perforated building material, aerated concrete and for bridging thicker render layers. That is exactly the case with a rendered facade: the first 20 to 30 mm of your drill hole is in render that carries no load at all. So do not measure your plug against the wall, but against the wall minus the render layer.
Bringing in a third manufacturer yields less than you would hope. Rawlplug describes the UNO as a plug that fits any base material, solid or hollow, with a split head and anti-rotation elements, and lists concrete, solid brick, solid calcium silicate brick, vertically perforated clay blocks, hollow calcium silicate brick, aerated concrete, plasterboard and gypsum fibreboard as approved base materials. Drill diameter, drilling depth and load per base material are not given; they are in the approval documents KOT-2022/2086 and KDWU-2022-2086-UNO. For TOX we found no technical data at all at manufacturer level: the sizes 5 x 31, 6 x 36, 6 x 51, 7 x 36, 8 x 51 and 10 x 61 mm come from retailers such as Hornbach, not from the manufacturer itself. That is no reason to distrust those plugs, but it is a reason not to choose them if you need a figure you can justify.
If there is a timber stud or batten behind your plasterboard, screw into that and not into the board. We searched fischer, Rawlplug, Würth and Spit for a specified drill diameter and drilling depth for fixing into a timber frame stud and found none from any of them; the same applies to a steel or timber gatepost. That is where the public information on this point currently stands. What is certain: fischer does not publish a maximum load in plasterboard for the DuoTec 10 and 12 either, and that is exactly the situation where you most want to know. If that is your situation, first read how to hang a wall-mounted model without leaks or a cold bridge, because more depends on it than just the plug.

How do I mount a parcel letterbox on a rendered or insulated facade?
Differently from on solid masonry, and this is the point at which most installations quietly fail. On a facade with external insulation, you do not screw into the insulation, nor straight through the insulation into an ordinary plug. You need a system that either carries the load within the insulation itself, or reaches through the insulation into the load-bearing layer without compressing the insulation.
fischer makes two products for this and literally names letterboxes as an application for both. The TherMax 8/160 M6 is the through-anchor: drill diameter 10 mm, drill hole depth 220 mm, anchorage depth 60 mm in the load-bearing layer, usable length 140 to 160 mm, thread size M6, suitable for an insulation thickness of 45 to 180 mm. What makes it special is the glass-fibre-reinforced anti-cold cone on the head of the threaded rod, which automatically cuts its way through the insulation material and, according to fischer, breaks the thermal bridge. Approved base materials are concrete, the brick variants, aerated concrete, calcium silicate brick and timber. The TherMax is also available as 8/60, 8/100 and as 10/160 M6.
The lighter alternative is the FID insulation plug, intended for light attachments in rendered and unrendered insulation boards. fischer names letterboxes, lamps and motion detectors as examples. The FID 50 K has a drill diameter of 4.5 to 5.0 mm, a plug length of 50 mm, is intended for insulation boards thicker than 50 mm and has a maximum screw-in depth of 35 mm with a TX40 drive. The FID 90 K has a drill diameter of 6.0 mm, a plug length of 90 mm and a maximum screw-in depth of 80 mm.
For both systems, the load tables exist as separate PDF documents. For the TherMax there are three separate tables: masonry and concrete, timber, and shear load. The concrete kilonewton figures are not on the product page, so we do not reproduce them here. What you can read from that structure: under shear load, so a weight hanging from a protruding part, such a connection behaves differently from under tension. A parcel letterbox on an insulated facade hangs mainly in shear.
If your facade is only rendered and not insulated, you do not need a stand-off mounting system. Then the rule from the previous section applies: use a longer DuoPower, so that the anchorage depth falls entirely within the load-bearing brick and not in the render. The DuoPower 6 x 50 has a minimum anchorage depth of 55 mm at a drill hole depth of 60 mm, the 8 x 65 comes to 71 mm and the 10 x 80 to 88 mm. Subtract your render thickness from that length, and what is left is what actually carries the load.
MINIMUM ANCHORAGE DEPTH OF THE FISCHER DUOPOWER
Minimum anchorage depth per size according to the fischer Nederland product overview page, consulted on 26 August 2026. Subtract your render thickness from this to know what is in the load-bearing brick.
How tight may I turn the screws in thin sheet steel?
This is the most concrete piece of expertise in this article, so here are the figures first. In its own technical product information, Würth Nederland gives guide values for the tightening torque of self-drilling screws, and explicitly notes that the tightening torque depends on the material thickness.
| Screw diameter | Tightening torque according to Würth | What that means in practice |
|---|---|---|
| 4.2 mm | 3.0 Nm | That is light. With a cordless screwdriver on the highest setting you reach this within half a second |
| 4.8 mm | 3.0 to 5.0 Nm | The common size for sheet metal; set your clutch in the middle of the scale and test on an offcut |
| 5.5 mm | 4.0 to 5.0 Nm | So a thicker screw gives hardly any more torque, because the sheet remains the weakest link |
| 6.3 mm | 2.5 to 6.0 Nm | The wide range is the material thickness: in thin sheet metal you are at the bottom end of the range |
With bolts, the story is bigger than most people think. Würth gives tightening torques for stainless steel bolts according to DIN 3506 at different friction coefficients. For an M8 that runs from 6.8 to 19.3 Nm at a friction of 0.10, from 10.1 to 28.7 Nm at 0.20, and 11.9 Nm at 0.30. The same little bolt, then, with a spread of a factor of four. Friction depends on whether the thread is dry, lubricated, slightly dirty or stainless on stainless. That last one is why stainless steel in stainless steel can seize: the thread cold-welds and then you shear the bolt instead of tightening it.
Why overtightening in sheet of around a millimetre goes wrong so quickly
The explanation is not found at the letterbox manufacturers but in screw technology. Aandraaimoment.nl states the core principle: the total thickness of the parts being screwed must be greater than the pitch of the chosen screw, otherwise the desired tightening torque cannot be reached. Work that through. According to Logixbox, which described its own products on 30 April 2024, a parcel letterbox on the market is made of 1.0 to 1.2 mm steel with powder coating. At that sheet thickness, fewer thread turns engage than the pitch of a common sheet metal screw is long. So you cannot bring the connection to torque: the screw pulls through the material, the hole gets bigger instead of tighter, and nothing on your machine tells you it is happening until it already has.
What you do instead, in two routes. Route one: drill through and use a bolt with a nut and a wide washer, so the force is spread over a larger area of sheet and the nut takes the torque instead of the sheet. Route two: blind rivets. Rapid stocks them in diameters of 3.2, 4.0 and 4.8 mm and gives a grip range table running from a grip range of 2 to 4 mm at a rivet length of 8 mm, up to a grip range of 19 to 22 mm at a rivet length of 25 mm. In stainless steel A2, blind rivets according to DIN 7337 form A are common in 3 x 10, 3.2 x 14, 4.8 x 8, 4.8 x 16, 4.8 x 20 and 5 x 10 mm.
Here we must point out a gap in the public information, because it is a gap you run into during the job. On its own blind rivet guide, Rapid publishes no hole diameter per rivet diameter and no material comparison between aluminium, steel and stainless steel. We looked at Rapid and in the DIN 7337 standard for a rule of thumb on hole diameter and did not find one publicly. The same goes for galvanic corrosion: no manufacturer we found publishes what an aluminium rivet in steel, or a stainless steel screw in a galvanised, powder-coated body, does over time. If in doubt, ask the supplier of your fixings, not a forum.
For pre-drilling sheet metal screws there are usable figures. Aandraaimoment.nl publishes pilot hole tables for sheet metal screws from 3.50 to 6.30 mm, per sheet thickness, distinguishing between steel and stainless (VA) sheet on the one hand and aluminium sheet on the other. Examples from those tables: a 3.50 mm screw needs a pilot hole of 2.60 to 3.20 mm, a 4.80 mm screw a pilot hole of 3.70 to 4.40 mm, and a 6.30 mm screw a pilot hole of 4.90 to 5.90 mm. Drill wider and you lose thread. Drill narrower and your torque rises through friction instead of clamping force, and then you are measuring something other than you think.
How do I assemble a parcel letterbox step by step?
In four moves: measure, drill, set stress-free, fix and seal. Below that is the same job in ten steps, so you can tick them off as you go.
- Decide on the spot and measure the height. The letter slot belongs at 1.1 metres above the level at which the box is operated, with 0.6 metres as the absolute lower limit and 1.8 metres as the upper limit. First draw the line of the slot on the wall in pencil and work up and down from there, not the other way round.
- Check the walking distance and accessibility. The box must be reachable within ten metres of the road boundary. Walk the route yourself with a parcel in your hands: if you have to manoeuvre around a planter, so does the delivery driver.
- Lay out the parts and read through the instructions. With a self-assembly kit, first assemble the body completely on the ground and only then on the wall or plinth. On the ground you can still straighten everything, on the wall you cannot.
- Determine your base and choose your plug. Use the table above. If you are unsure between two types of brick, choose the longer plug, because length forgives a wrong guess and diameter does not.
- Mark the holes through the body or the mounting plate. Hold the body in place with the spirit level on it, mark the holes, remove the body and only then drill. Drilling with the box in your other hand always gives you a crooked box.
- Drill with the right diameter and depth. Keep to the drill hole depth the plug manufacturer specifies, not the plug length. For the DuoPower 8 x 40 that is a 50 mm hole for a 40 mm plug; the extra space is for the drilling dust you never get out completely.
- Clean out the holes. Vacuum or blow them clean and tap the wall afterwards. Drilling dust between plug and brick acts as a lubricant, and that is exactly what you do not want under a box that will hang on the facade for ten years.
- Insert the plugs and hang the body loosely on two screws. Do not tighten anything yet. Now check horizontally with the long spirit level and vertically with the angle level, and look at the door: does it clear the body equally all round?
- Fill the gaps until the body is stress-free. Slide shims or plastic rings behind the fixing points until the body is not bent anywhere. Then tighten crosswise, in two rounds, with the tightening torques from the previous section.
- Seal the top edge and the openings. Seal the top edge against water running in and leave the bottom open, so any moisture that does get in can get out. Only apply sealant above 5 degrees. Then test the flap and the lock with the key, twenty times in a row, and put your house number on straight away.
We deliberately leave out two parts here, because they are a story of their own. If you are placing a freestanding model on your own land, the job starts with the foundation and not with the box: that is covered in freestanding installation with foundation, height and the ten-metre rule. If you want to fix the box so it cannot be carried off whole, read how to anchor a parcel letterbox. If you are building it into a wall, gate or fence, a different method applies, and it is described in building in a parcel letterbox.
Note. A letterbox manufacturer that writes it down itself: the Post-Point installation manual warns that on a wall that is not flat, the letterbox body comes under stress and the letterbox door starts to catch. According to the same manual, it must be hung stress-free. That is why step nine above must not be skipped, even if the wall looks flat.

At what height should a parcel letterbox hang?
At 1.1 metres, measured from the letter slot to the level at which the box is operated. That is in article 6 paragraph 2 of the Postregeling 2009 (the Dutch postal regulation), and it is not advice but the text of the regulation: the letter slot is fitted horizontally in a vertical surface or in the top surface and sits at 1.1 metres, or in any case no lower than 0.6 metres or higher than 1.8 metres above the level at which the letterbox is operated.
Note those last words, because that is where almost every webshop goes wrong: it is about the operating level, not ground level and not the pavement. If your box stands on a raised base or a plinth, the reference point moves with the spot where the delivery driver stands.
The rest of the placement requirements are in article 5 of the same regulation. Paragraph 1: letterboxes are fitted as close as possible to the carriageway of a public road that motor vehicles with more than two wheels can drive on. Paragraph 3: the numbering must clearly indicate which home the letterbox belongs to. Paragraph 4: the box is placed so that it can be reached within ten metres of the boundary of a road. Paragraph 7: the level at which the boxes are operated is no more than 2.5 metres above or below the road surface. Paragraphs 5 and 6 cover the exceptions for grouped boxes in gallery flats, communal buildings and holiday parks.
Article 6 covers the design. Paragraph 1: the shape and colour are such that confusion with the letterboxes of the universal postal service provider is not possible. Paragraph 3: the clear drop opening is at least 265 mm long and 32 mm wide. Paragraph 4: the opening must be designed so that it can be operated without risk of injury. Paragraph 5: if there is a storage space behind the drop slot, the usable internal width is at least 270 mm and the two other internal dimensions at least 150 and 380 mm.
Where the law and PostNL differ
PostNL publishes its own leaflet with the conditions for design and placement, and it is not identical to the regulation. That difference is useful to know, because the delivery driver works with the leaflet in mind and the legislator with the regulation.
| Subject | Postregeling 2009 | PostNL leaflet |
|---|---|---|
| Height of the drop opening | 1.1 m, no lower than 0.6 m and no higher than 1.8 m (article 6 paragraph 2) | 110 cm from the ground, at least 60 cm, at most 180 cm |
| Size of the drop opening | At least 265 mm long and 32 mm wide (article 6 paragraph 3) | At least 26.5 cm wide and 3.2 cm high |
| Depth of the storage space | At least 150 mm, alongside 270 and 380 mm (article 6 paragraph 5) | Minimum required 15 cm, recommended at least 25 cm |
| Walking distance from the road | Reachable within ten metres of the boundary of a road (article 5 paragraph 4) | Maximum 10 metres walking distance for the postal worker from the road |
| Steps and height difference | Operating level at most 2.5 m above or below the road surface (article 5 paragraph 7) | Steps no higher than 2.5 metres |
| House number | Numbering clearly indicates which home the box belongs to (article 5 paragraph 3) | House number clearly visible on or near the box; in flats matching the house numbering |
| Draught brushes and springs | Not stated | In the leaflet of 14 March 2017: no spring mechanisms, rubber strips or stiff draught brushes |
The most important row in that table is the third. The 25 cm depth in the current PostNL leaflet is a recommendation from PostNL and not a legal requirement; the legal minimum is 150 mm. Anyone who tells you that a box with 20 cm storage depth does not meet the requirements is confusing the recommendation with the rule. Incidentally, the leaflet of 14 March 2017 gave the storage space as 15 cm deep, 27 cm wide and 38 cm high, which are exactly the three dimensions from article 6 paragraph 5.
And then the point that is still wrong on countless Dutch pages: the Besluit brievenbussen (Letterbox Decree), file number BWBR0004448, lapsed on 1 April 2009. It applied from 1 January 1989 up to and including 31 March 2009. Every page that still refers to the Besluit brievenbussen today is therefore referring to withdrawn law more than seventeen years old. The applicable regulation is the Postregeling 2009, file number BWBR0025578, in force since 1 April 2009, with a version that on 26 August 2026 was marked on wetten.overheid.nl as valid from 1 July 2026. PostNL refers to the same regulation in its own leaflet, citing Staatscourant 2009, no. 61. We could not find that exact Staatscourant number in the official publication itself; the amending regulation can be found as Staatscourant 2009, 4638.
All dimensions and requirements in one place, including what applies to a separate parcel flap, are in letterbox requirements in the Netherlands. On our freestanding models, the drop opening falls within the 0.6 to 1.8 metre range from article 6 paragraph 2, with external heights of 1000 mm for the Style, 1020 mm for the Home and 1120 mm for the Plus. That is exactly why a freestanding model works on a driveway or in a front garden without raising or lowering anything.
What are the 5 biggest mistakes when assembling a parcel letterbox?
They can all be avoided in the five minutes before you pick up the drill. Below are the five that cost the most, each with its source, followed by a table of the other mistakes that come up in the manuals and installation guides.
Mistake 1. Mounting on a wall that is not flat, without shims
This is the most expensive mistake, because you only notice it weeks later. The installation manual from Post-Point, a manufacturer's manual for letterboxes, says it literally: on a wall that is not flat, the letterbox body comes under stress and the letterbox door starts to catch. It must be hung stress-free. A brick facade is never perfectly flat, and a body of thin sheet steel follows the shape of the wall if you pull it tight with four screws. The result is a door that jams, a lock that turns more stiffly and, eventually, a flap that no longer closes as intended.
The solution costs two euros: shims or plastic rings behind the fixing points, so the body rests on four points instead of being pulled into a curve. Tighten crosswise and test the door in between. If the lock feels stiffer than when the box was still loose, there is stress on it and you turn back a quarter turn.
Mistake 2. The wrong wall plug in porous or hollow masonry
Woonvrienden.nl explicitly names this as a common mistake: a universal plug in porous stone. The justification comes from the manufacturer itself. fischer makes a separate product for aerated concrete, the Gasbetonplug GB, with a drill diameter of 8 mm, a minimum drill hole depth of 60 mm, a plug length of 50 mm, a screw diameter of 5 mm, approved for aerated concrete PB2, PB3 and PB4, or AAC2, AAC3 and AAC4, and with the instruction to drill in rotary mode. For perforated building material, fischer positions the longer DuoPower versions 6 x 50, 8 x 65 and 10 x 80.
The failure mechanism is different from what people expect. A universal plug in aerated concrete seems to grip fine when you tighten it, because the material is soft and the plug expands. But that expansion pushes the aerated concrete away instead of gripping it, and the plug turns with the screw as soon as it is under tension. With hollow masonry it is even more direct: your plug expands into the cavity and grips the inside of a brick wall only a few millimetres thick.
Mistake 3. Overtightening screws in the thin sheet steel of the body
The figures are already above: Würth gives 3.0 Nm for a 4.2 mm self-drilling screw and 3.0 to 5.0 Nm for 4.8 mm, and explicitly states that the tightening torque depends on the material thickness. According to aandraaimoment.nl, the total thickness of the parts being screwed must be greater than the pitch of the screw, otherwise the desired torque cannot be reached. Logixbox described its own boxes on 30 April 2024 as 1.0 to 1.2 mm steel with powder coating, and that is exactly the range where this comes into play.
In practice: turn the last quarter turn by hand or with a set clutch, not with the hammer drill. If the screw suddenly feels lighter instead of heavier, the thread has already pulled out of the material and turning further does not help. We found no manufacturer source quantifying the point of failure, so there is no table saying at what torque a 1.0 mm sheet tears out. What the sources do support: at this sheet thickness, a bolt with nut and wide washer, or a blind rivet, is the right choice, not a self-tapping screw you tighten by feel.
Mistake 4. Thinking a watertight plug is an outdoor plug
This mistake is almost endearing, because the logic is easy to follow. fischer has a plug that is literally watertight: the DuoSeal, with waterproofing class W3-I according to ETAG 022 and DIN 18534. Drill diameter 6 mm with a hole tolerance of 6.0 to 6.4 mm, minimum material thickness 22 mm, plug length 38 mm, supplied screw 4.5 x 60 mm in stainless steel A2, sealing depth 5 to 14 mm.
However: fischer positions that product for tiled wet rooms, so bathroom, kitchen, spa and swimming pool, and not as an outdoor application. Watertight here means that no water gets behind your tiling via the fixing, not that the plug is intended for a facade exposed to driving rain and frost. For outdoors the route is different: fix mechanically with the right anchor and seal the opening with sealant suitable for outdoor use. More on that in watertight and winterproof.
Mistake 5. Fixing into facade insulation without a stand-off mounting system
On a facade with external insulation, an ordinary plug in the insulation board is not a fixing, and a long screw through the insulation into the load-bearing layer is a cold bridge. fischer makes two products for this and literally names letterboxes as an application for both: the TherMax with the anti-cold cone that, according to fischer, breaks the thermal bridge, and the FID for light attachments in the insulation board itself. Skip that, and you compress the insulation under the mounting plate and create exactly the spot where condensation forms in winter. The building physics behind it is covered in hanging a wall-mounted model without leaks or a cold bridge.
The other mistakes from the installation guides
| Mistake | What you notice | Source |
|---|---|---|
| Not vacuuming or blowing out the drill hole | The plug seems to grip and comes loose from the hole after a few months under tension | Woonvrienden.nl, consulted 26 August 2026 |
| Not working level or not using a spirit level | Water stays on the flap and the door swings open or shut by itself | Woonvrienden.nl and Doika.be, 2 January 2026 |
| Placing on loose paving slabs or subsided paving | The box leans after a winter; Doika.be lists this as mistake number one | Doika.be, 2 January 2026 and Woonvrienden.nl |
| Insufficient anchoring against wind | A wobbly box that moves in a storm; the plug must suit the weight and wind load | Doika.nl, 16 October 2022 and Woonvrienden.nl |
| Drop opening too high, too low or hard to reach | The delivery driver skips the box; the standard is 1.1 m with limits at 0.6 and 1.8 m | Woonvrienden.nl and Postregeling 2009, article 6 paragraph 2 |
| House number forgotten or illegible | Post goes to the neighbours; the numbering must clearly indicate which home the box belongs to | Postregeling 2009, article 5 paragraph 3 and the PostNL leaflet |
| Placing too close to the property boundary without checking | Dispute with the neighbours or the municipality about a structure in the front garden area | Woonvrienden.nl, with iplo.nl on garden and plot boundaries |
| Forgetting maintenance after installation altogether | Seized lock and loosened fixing; Bostik advises periodic inspection of the fixing | Doika.be, 2 January 2026 and Bostik DIY, consulted 26 August 2026 |
| Too little space to take the parcel out | You have to reach around a corner; choose the spot so the door can open fully | Doika.be, 2 January 2026 |
That last one is a placement mistake you prevent when measuring up, not afterwards. How you load and empty the box depends on the direction in which the door works, and that difference is explained in rear retrieval or front retrieval. If your box is still skipped after correct installation, the cause often lies elsewhere: that is covered in why your delivery driver skips your parcel letterbox.

Can I assemble a parcel letterbox in winter or in frost?
Drilling and screwing can be done all year round. Anything that has to cure cannot. That is the whole summary, and the difference between those two groups is bigger than most people think.
Start with the side that surprises most. A professional injection mortar system may be installed below zero. In its own engineering answer on chemical anchors at low temperatures, Hilti Nederland states that HIT-RE 500 V4 can be used down to a base material temperature of 5 degrees below zero, that HIT-HY 200 V3 can go down to 10 degrees below zero in specific cases, and that HIT-ICE was developed for extreme cold down to 23 degrees below zero. With an important restriction: the cartridge itself must be used from +5 degrees for the HIT-RE 500 V4. Hilti advises using the cartridges as warm as possible, straight from heated storage or preferably from a warm site cabin, and warns that curing times increase considerably.
How much they increase is in the technical data sheet for HIT-HY 200 (January 2023 version). The installation temperature there is 10 degrees below zero to +40 degrees for the HAS-U, HAS-D and HIS-N anchor rods, and +5 to +40 degrees for HIT-Z and HIT-Z-D. Working time and curing time per temperature band for HY-200-A are given below.
| Base material temperature | Working time | Curing time |
|---|---|---|
| 10 to 5 degrees below zero | 1.5 hours | 7 hours |
| 5 degrees below zero to 0 degrees | 50 minutes | 4 hours |
| 0 to +5 degrees | 25 minutes | 2 hours |
| +5 to +10 degrees | 15 minutes | 75 minutes |
| +10 to +20 degrees | 7 minutes | 45 minutes |
| +20 to +30 degrees | 4 minutes | 30 minutes |
| +30 to +40 degrees | 3 minutes | 30 minutes |
So that is a factor of nine between a day in May and a day in January, with exactly the same mortar. The HY-200-R version has even longer working and curing times in the same temperature ranges. Build that time into your planning: you do not hang the box on it while the mortar has not yet hardened, and in winter that means waiting half a day instead of a cup of coffee.
CURING TIME OF HILTI HIT-HY 200-A PER BASE MATERIAL TEMPERATURE
Hilti, Technical Datasheet HIT-HY 200, January 2023 version. Bars are proportional to the curing time of the HY-200-A.
Sealant and adhesive have a hard lower limit
Where an injection mortar may be used below zero, sealant and construction adhesive stop much earlier. On its own page about DIY at low temperatures, Bison writes that 5 degrees is the critical limit: if the temperature falls below 5 degrees Celsius, adhesives and sealants will no longer cure or dry. Above 5 degrees but below room temperature, curing times become considerably longer. Water-based products can be irreparably damaged by freezing, and according to Bison that applies to wood glue, wallpaper paste, tile adhesive, floor covering adhesive and acrylic sealant. A minimum storage temperature of 5 degrees applies to PU adhesives and construction adhesives, solvent-based products, PVC adhesive, Poly Max, silicone sealant and spray adhesive. Bison also warns not to force the warming up, because the product can then become unusable.
In its own knowledge centre, Bostik arrives at the same lower limit: minimum application temperature +5 degrees as the standard recommendation, optimal storage between +5 and +25 degrees, and problems arise above +45 degrees. Two details from that page you can really use on a winter's day. First: acetic-cure silicone sealants can crystallise below 5 degrees below zero, and warming the sealant above +5 degrees reverses that crystallisation. Second, and this is the most important sentence of the whole section: at lower temperatures there may be condensation or ice on or in the substrate, which destroys good adhesion of the sealant. So your sealant can be warm and perfect and still not adhere, because the stone has an invisible film of moisture. Cured sealant becomes stiffer at 10 degrees below zero, silicones remain relatively insensitive to temperature, and according to Bostik full curing can take several days to weeks, depending on sealant type and layer thickness.
- Drilling into stone and concrete
- Inserting plugs and screwing mechanically
- Hilti HIT-RE 500 V4 down to 5 degrees below zero base material temperature
- Hilti HIT-HY 200 V3 in specific cases down to 10 degrees below zero
- Hilti HIT-ICE down to 23 degrees below zero
- Silicone sealant and acrylic sealant (Bison, Bostik)
- Construction adhesive and structural adhesive
- The HIT-RE 500 V4 cartridge itself, which must be used from +5 degrees
- Any substrate that may have condensation or ice on it, because that destroys adhesion (Bostik)
On construction adhesive as an alternative to drilling: it exists, and Bostik has its own instructions for mounting a letterbox with it. There, Bostik recommends Mamut construction adhesive based on hybrid technology, suitable for stone, concrete, glass, plasterboard, metals and ceramics, with a tensile strength of 220 kg per 10 cm2 and water and weather resistance from 40 degrees below zero to +90 degrees. That last figure is the service temperature and not the application temperature; the application temperature is not on that page, so for that you fall back on the +5 degrees from Bison and Bostik itself. Bostik further specifies that the substrate must be firm, clean, dry, grease-free and dust-free, that you apply the adhesive in vertical beads 10 to 20 cm apart with a layer thickness of 2 to 3 mm, and recommends periodic inspection of the fixing.
One more limit we cannot close, which you therefore read explicitly here: we searched Hilti, fischer, Würth and Spit for a manufacturer source that literally warns against drilling into frozen masonry or setting plugs in frozen stone, and we did not find one. There are primary sources on bricklaying in frost, from the Koninklijke Nederlandse Bouwkeramiek (the Royal Dutch Building Ceramics association) and from Wienerberger, but those concern masonry mortar and not drilling or plugs. For fischer FIS V Plus 360 S, Rawlplug R-KEX and the injection mortars from Würth and Spit, the minimum base material temperature is not on the product page. fischer does state that FIS VW Plus High Speed has a shorter curing time that is particularly beneficial at low temperatures.
Do I need a permit, and what if I rent or am in an owners' association?
For a box on the facade or in the front garden you do not need a permit in practice, but the legal basis for that is thinner than everyone makes out. Here is what can be backed up with a primary source.
The planning track runs via the Besluit bouwwerken leefomgeving (the Dutch Building Decree), file number BWBR0041297. The Informatiepunt Leefomgeving (IPLO, the Dutch government's environmental information point) writes that structures that meet the conditions of articles 2.29 and 2.30 Bbl are permit-free. Article 2.29 contains a series of categories for which the prohibition on carrying out an environmental plan activity without an environmental permit does not apply: ordinary maintenance, a dormer in the rear roof surface, roof lights, solar panels, facade elements in the rear facade, sun shading, garden furniture up to 2.5 m, play equipment up to 2.5 m, a garden or plot boundary partition up to 1 m, terrace structures, a flagpole up to 6 m, antenna installations and utility facilities up to 3 m and a maximum of 15 m2.
There is also a permit-free category for another structure in the front or back garden area that is no higher than 1 m and no larger than 2 m2. Here we have to report a contradiction that we are not going to paper over: rechtspraakbestuursrecht.nl gives this category as item r of article 2.29 and states that the article has eighteen items, a to r, while we could not find that item in the list when reading article 2.29 directly on wetten.overheid.nl. Rechtspraakbestuursrecht.nl is not an official publication. So if you are relying on that 1 metre and 2 m2, open the article yourself on wetten.overheid.nl.
For garden and plot boundaries, the system is clear, and it is useful because a box on the property boundary often ends up in that discussion. The Informatiepunt Leefomgeving writes: technically, a garden or plot boundary partition up to 2 m is permit-free regardless of location, under article 2.26, paragraph 2, under c, Bbl, and above 2 m a building notification is required. In planning terms, up to 1 m is unconditionally permit-free nationally under article 2.29, under j, Bbl, and up to 2 m can be permit-free locally if the environmental plan allows it. According to article 2.23 Bbl, the height is measured perpendicular from where the finished ground is highest, with temporary ground adjustments not counting.
And now the core of this section. Not a single primary source and no municipal page we found mentions a letterbox or parcel letterbox by name. The word letterbox does not appear in article 2.29 Bbl. We searched wetten.overheid.nl, iplo.nl and municipal sites for a page dealing specifically with letterboxes, and there is none. At the same time, almost every Dutch front garden has a letterbox. So the practical route is simple: if your box is in the front garden area of a listed building or in a nationally protected townscape or village view, according to the Informatiepunt Leefomgeving there is a restriction on permit-free building and you call your local council. If you are in doubt in any other case, call as well. It takes five minutes and you get the answer from the only party that decides on it.
On listed buildings we can be precise about what is not there. Monumenten.nl lists as permit-free small and routine maintenance where material, colour, shape, detailing and profiling remain unchanged, with examples such as sanding and painting in the same colour, replacing broken panes or roof tiles with the same type, and local repairs to frames, windows, doors and render. That page says nothing about fixing a letterbox, a house number or a lamp to a listed facade, and the advice there is to contact the municipality if in doubt.
Rented home and owners' association (VvE)
For tenants, the legal starting point is article 7:215 of the Burgerlijk Wetboek (the Dutch Civil Code), on changes to the rented property by the tenant. We do not quote any paragraph of that article here, because we could not verify the literal text on wetten.overheid.nl, and retelling a legal article without the text alongside it is exactly how incorrect information arises. What you do in practice: ask the landlord for permission in writing, including the location and the fixing method, and keep the answer. A freestanding model that you set in the ground instead of screwing into the facade also changes nothing about the building. That is a route many tenants overlook.
For an apartment with a shared external facade the same caveat applies, and if anything more strongly. We could not read a primary source, not in Book 5 of the Dutch Civil Code, not in model regulations on division into apartment rights and not in case law, that establishes that the external facade of an apartment building is a common part and that drilling into it requires the owners' association's permission. The general expectation in property practice points that way, but we are not putting down a legal conclusion here that we cannot back up with the text. What you do: read your own deed of division, because it states which parts are common, and if in doubt put it to the board of the owners' association.
How do I get a sensor cable through the wall watertight?
Briefly, because this is a twenty-minute job if you know the order. If you want to know whether there is a parcel in your box without walking outside, a cable or sensor comes into play. Sensors, notifications and Home Assistant are covered in smart parcel letterbox; here it is only about the hole in the facade.
The only source we found with a complete method is Elektrakoning, a webshop with a detailed explanation of cable entries. That is a secondary source, so you read it here as a method and not as a standard. The four points that come out of it are technically logical, though, and match what the sealant manufacturers write.
One: drill the hole with a slight slope to the outside, so the outer end is lower than the inner end and rainwater runs out instead of in. Elektrakoning gives no degrees for that slope, and we found no primary source naming an angle, so keep it to a visible fall. Two: slide a protective sleeve through the hole, so the cable does not rub against the brickwork. Three: seal in two places, around the cable and around the sleeve against the wall. Four: use a cable gland, because it provides strain relief and sealing against dust and water, up to IP68 according to this source. For a standard domestic installation cable with a diameter of 6 to 13 mm that is an M20 gland, for a heavier underground cable of 11 to 17 mm an M25.
The misconception this source clears up is the rubber grommet. A grommet is not watertight, it only protects the cable. So for outdoors it is not enough. Finish the outside with a bend or a cap facing downwards against driving rain. And when choosing a sealant, remember that according to Bostik you must work above +5 degrees and that full curing can take days to weeks.
Two things you come across online that have no justification for this use: MS polymer sealant is offered by sellers as watertight and UV-resistant for outdoor use, but we could not verify that product claim with a sealant manufacturer. And the EPDM grommets you find are roof penetrations for flat roofs, not facade cable entries. Not a single manufacturer of sealant, tape or EPDM we found gives specific advice for a parcel letterbox sensor cable through an external wall.
Which BunnyBox is the easiest to assemble?
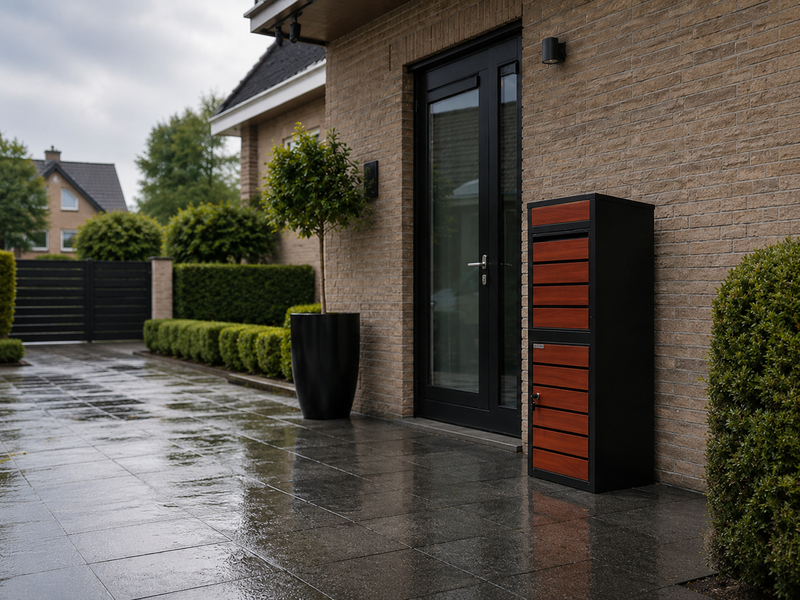
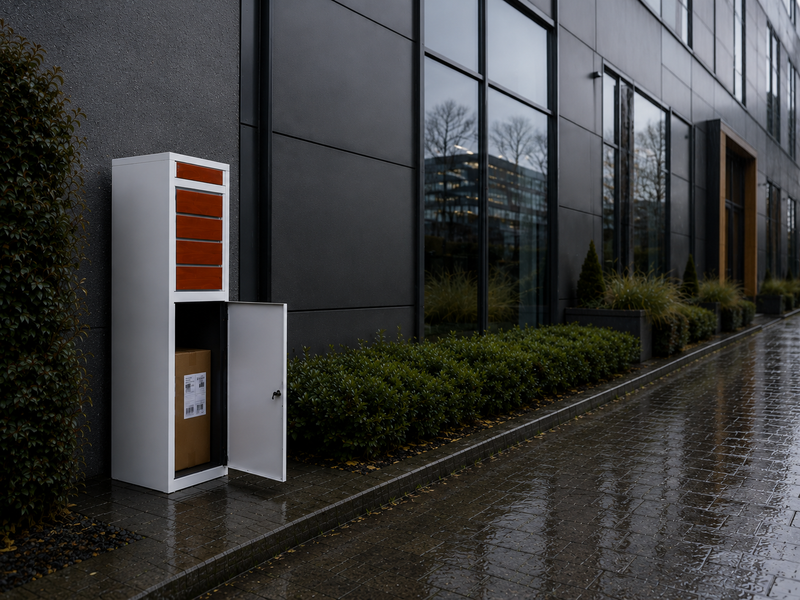
The Compact, by a wide margin: it is the only series that arrives at your home pre-assembled. You hang it up and you are done. External dimensions 365 x 250 x 450 mm, parcels up to 300 x 200 x 200 mm, packed weight 6.5 kg, with a separate slot and one compartment. That low weight and small height also make it the friendliest choice for a facade you want to drill as few holes in as possible. View it on the BunnyBox Compact page.
The Style, the Home and the Plus come as a self-assembly kit. That sounds like more work, but it is mainly a different order: you assemble the body on the ground, where you can still straighten everything, and only then does it go in place. The instructions are on our assembly instructions page, so you can read through the steps before the box arrives.
The dimensions that matter when measuring up are below. All series are made of 0.7 mm galvanised sheet steel with Qualicoat Class 2 powder coating with zinc phosphate pretreatment, and have a door with a key lock and two keys and a flap on top for the delivery driver. Colours: RAL 9005 black, RAL 9010 white, RAL 7036 platinum grey, RAL 7016 anthracite, and combinations with dark teak or light oak.
| Model | Type and assembly | External dimensions in mm | Parcels up to in mm | Post and parcels | Weight packed |
|---|---|---|---|---|---|
| Compact | Wall-mounted model, supplied pre-assembled | 365 x 250 x 450 | 300 x 200 x 200 | Separate slot, 1 compartment | 6.5 kg |
| Style | Standing post with wood-effect front, self-assembly kit | 380 x 365 x 1000 | 350 x 320 x 200 | Separate slot, 1 compartment | 17.0 kg |
| Home | Freestanding, self-assembly kit | 410 x 380 x 1020 | 370 x 320 x 210 | 1 compartment | 16.0 kg |
| Plus | Tall standing post, self-assembly kit | 500 x 370 x 1120 | 450 x 320 x 210 | Separate compartments for post and parcels | 20.0 kg |
The parcel compartment of a freestanding model is almost half a metre tall, and that is exactly why measuring up is worth the effort: a week of orders fits inside. In figures, measured with tilting as a delivery driver does it: the Home and the Style take 14 book packages, the Plus 18. Every freestanding model takes four shoeboxes. As for phone boxes, 40 fit in the Home and the Style, 42 in the Plus and 9 in the Compact. So you do not empty the box every evening because it is full, but because you want to.
If you choose by size, the range goes up. If a parcel of 300 x 200 x 200 mm is not enough for you in most cases, the BunnyBox Home with 370 x 320 x 210 mm is the next step. If you regularly order longer boxes, the BunnyBox Plus with 450 x 320 x 210 mm is the answer, and it also has separate compartments for post and parcels. If you first want to work out what needs to fit through your box, which size parcel letterbox do I need and the model comparison in which BunnyBox suits me will help. Always someone home with a BunnyBox, even if the assembly happens on a Saturday afternoon.

View the models
Frequently asked questions about assembling a parcel letterbox
Which wall plug do I use for a parcel letterbox on a brick wall?
A universal nylon plug of 8 or 10 mm in the brick, not in the mortar joint. The fischer DuoPower 8 x 40 needs a hole of 8 mm and 50 mm deep with a minimum anchorage depth of 46 mm; the 10 x 50 needs 10 mm and 60 mm deep. The load values fischer gives were measured in concrete and are not published per type of brick, so keep a margin and follow the manufacturer's load table.
At what height should I hang a parcel letterbox?
The letter slot at 1.1 metres above the level at which the box is operated, with 0.6 metres as the lower limit and 1.8 metres as the upper limit. That is in article 6 paragraph 2 of the Postregeling 2009 (the Dutch postal regulation). The PostNL leaflet gives the same dimensions in centimetres: 110 cm, at least 60 cm and at most 180 cm.
How tight should I turn the screws of a letterbox?
According to Würth, 3.0 Nm for a 4.2 mm self-drilling screw, 3.0 to 5.0 Nm for 4.8 mm, 4.0 to 5.0 Nm for 5.5 mm and 2.5 to 6.0 Nm for 6.3 mm. For a stainless steel M8 bolt the specification runs from 6.8 to 28.7 Nm, depending on friction. Not a single letterbox manufacturer we found specifies a tightening torque in Nm itself.
Can I assemble a parcel letterbox without drilling?
Bostik has instructions for mounting a letterbox with construction adhesive and recommends Mamut construction adhesive for this, with a tensile strength of 220 kg per 10 cm2, applied in vertical beads 10 to 20 cm apart with a layer thickness of 2 to 3 mm on a firm, clean, dry and grease-free substrate. Bostik advises periodic inspection of the fixing.
Can I assemble a parcel letterbox in winter?
Drilling and screwing, yes. According to Bison, sealant and adhesive no longer cure below 5 degrees Celsius. A Hilti chemical anchor may, depending on the type, be used down to 5, 10 or 23 degrees below zero, but the curing time of HIT-HY 200-A then rises from 45 minutes at +10 to +20 degrees to 7 hours at 10 to 5 degrees below zero.
Do I need a permit for a parcel letterbox in my front garden?
Article 2.29 of the Besluit bouwwerken leefomgeving (the Dutch Building Decree) has a permit-free category for another structure in the garden area up to 1 metre high and 2 m2, and for garden or plot boundaries up to 1 metre (item j). Not a single primary source and no municipality we found mentions a letterbox by name. If in doubt, call your local council; it takes five minutes.
How do I mount a letterbox on a wall that is not flat?
With shims or plastic rings behind the fixing points. The Post-Point installation manual warns that otherwise the body comes under stress and the door starts to catch; it must be hung stress-free. Tighten crosswise in two rounds and check in between that the door clears the body equally all round.
What drill do I need for a parcel letterbox?
According to Bosch, a mains hammer drill of 400 to 500 watts or more is sufficient for masonry; for hard concrete a rotary hammer is the right machine because the impact force there does not depend on how hard you push. For tiles and aerated concrete, switch the hammer function off. For screwing, use an 18-volt cordless screwdriver.
Do I need to clean the drill hole before inserting the plug?
Yes. Not vacuuming out drill holes is on Woonvrienden.nl's list of common mistakes, because drilling dust between plug and brick acts as a lubricant. We found no manufacturer source that quantifies cleaning with a number of blow-outs, so the practical rule is: vacuum or blow out until no more dust comes out.
May my landlord or owners' association refuse a parcel letterbox?
For tenants, article 7:215 of the Burgerlijk Wetboek (the Dutch Civil Code) is the legal starting point on changes to the rented property. We do not quote any paragraph from it because we could not verify the literal text. Ask for permission in writing and keep the answer. In an apartment, the external facade is often a common part according to the deed of division, so read that deed and put it to the board.
Note. Last checked on 26 August 2026. Sources used: Postregeling 2009 (wetten.overheid.nl, BWBR0025578, version valid from 1 July 2026, consulted 26 August 2026); Besluit brievenbussen (wetten.overheid.nl, BWBR0004448, lapsed on 1 April 2009); Besluit bouwwerken leefomgeving, articles 2.23, 2.26, 2.29 and 2.30, BWBR0041297; Informatiepunt Leefomgeving on permit-free garden and plot boundaries (consulted 26 August 2026); PostNL, leaflet Waar moet jouw brievenbus aan voldoen (postnl.nl) and the older leaflet of 14 March 2017; fischer Nederland and fischer België on DuoPower, Gasbetonplug GB 8, SXR 10 x 80 T, DuoTec, DuoSeal, FID, TherMax 8/160 M6 and FIS V Plus (fischer.nl, consulted 26 August 2026); Rawlplug UNO (rawlplug.com, 26 August 2026); Würth Nederland, Technische Productinformatie (consulted 26 August 2026); Hilti Nederland on chemical anchors at low temperatures and Technical Datasheet HIT-HY 200 of January 2023; Bosch DIY on hammer drill and rotary hammer (26 August 2026); Bison, Klussen bij lage temperaturen (26 August 2026); Bostik knowledge centre on the influence of temperature on sealant and Bostik DIY on mounting with construction adhesive (26 August 2026); Post-Point, Montagehandleiding brievenbussen (26 August 2026); Rapid blind rivet guide (26 August 2026); aandraaimoment.nl on pre-drilling sheet metal screws (26 August 2026); Woonvrienden.nl (26 August 2026), Doika.be of 2 January 2026, Doika.nl of 16 October 2022 and Logixbox of 30 April 2024 for the common mistakes and the usual sheet thickness; Elektrakoning on cable entries (26 August 2026); Monumenten.nl on permit-free work on a listed building (26 August 2026). We review this page twice a year, and immediately after any change to the Postregeling 2009, the Besluit bouwwerken leefomgeving or the specifications of the manufacturers mentioned. More assembly and placement questions are answered in our Knowledge base.