In short
- The law that applies in the Netherlands is the Postregeling 2009 (Postal Regulations 2009), not the Besluit brievenbussen (Letterbox Decree): that decree was repealed on 1 April 2009 and is still quoted everywhere.
- Article 6(3) requires a clear letter opening of at least 265 by 32 mm, and Article 6(5) a storage space of at least 270 by 150 by 380 mm.
- The Postregeling says nothing about receiving parcels. There are no legal dimensions for a parcel compartment.
- Dutch manufacturers do not publish cut-out sizes. The rule of thumb: the cut-out is the outer dimension plus clearance, and the manufacturer's drawing is leading.
- Permits: the rear facade is usually permit-free, the front facade goes through the municipal environmental plan, and a listed building always counts as an alteration. Ask your municipality's Omgevingsloket (planning desk).
- According to OfferteAdviseur, building one into a load-bearing exterior wall costs €1,200 to €2,500.
- A freestanding BunnyBox needs no cut-out, no lintel and no permit discussion.
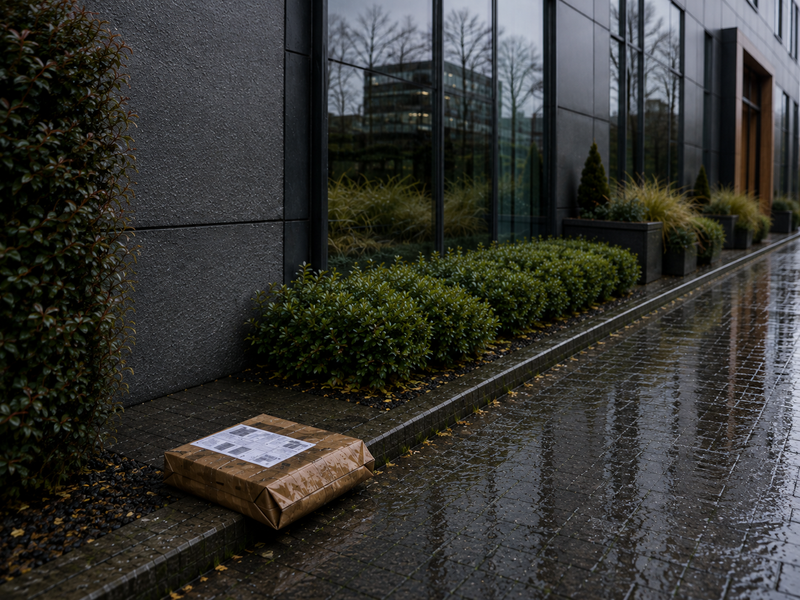
In most cases you are allowed to build a parcel letterbox into a wall, but the question is not only whether it is allowed: the finished wall thickness, the lintel and the thermal bridge decide whether it is actually possible. If you would rather skip the whole built-in process, place a freestanding model and avoid the cut-out, the lintel and the permit question in one go.
Below we walk through the whole process: which law really applies and which law almost every competitor still quotes wrongly, what that law does and does not say about parcels, how flush mounting and through-wall mounting differ, what cut-out size to work with when the manufacturer does not publish one, what a contractor charges per item, and where the sources contradict each other. We build our boxes ourselves in our own factory, so we know where a sheet metal dimension comes from and where a drawing stops. Where a source is missing, we say there is no source, rather than inventing a number.
- 265 mmMinimum clear letter opening in length, Postregeling 2009 Article 6(3)
- 1 April 2009Date the Besluit brievenbussen was repealed
- 10 mmClearance per side for the through-wall models from Briefkasten-Manufaktur
- €1,200 to €2,500Built into a load-bearing exterior wall, OfferteAdviseur, 10 February 2026

Which law really applies to a letterbox in your wall?
The Postregeling 2009, reference BWBR0025578, in the version applicable from 1 July 2026. That is the only Dutch regulation that sets requirements for the letterbox at your home. The Besluit brievenbussen, reference BWBR0004448, was repealed on 1 April 2009. Even so, that decree still appears on countless webshop pages and DIY blogs as the law you have to comply with. Anyone taking their dimensions from that repealed text is quoting law that has not existed for more than seventeen years.
In practice that does not change everything, because the core dimensions have stayed recognisable. But it does matter which article number you quote when you end up in a discussion with a contractor, a landlord or a municipality. A reference to Article 6(3) of the Postregeling 2009 closes a conversation. A reference to a repealed decree opens one.
The requirements fall into two groups. Article 5 is about the location: where the box stands relative to the road, how far the delivery driver has to walk, and whether the house number is on it. Article 6 is about the box itself: the slot, the height, the space behind it and safety. For a built-in box, Article 6(2), 6(3) and 6(5) matter most, because together they determine the minimum size of your cut-out and the height it sits at.
The full requirements at a glance
| Article | Paragraph | Requirement | What it means in practice |
|---|---|---|---|
| Art. 5 | 1 | As close as possible to the carriageway of a public road accessible to motor vehicles | A box deep in the garden or behind the house does not comply. If you build it into a side wall, check whether that wall still faces the street. |
| Art. 5 | 3 | House number clearly shown on or near the box | Plan the number plate into the cut-out. Drilling into fresh plaster afterwards is a waste of good work. |
| Art. 5 | 4 | Reachable within ten metres of the boundary of a road | Measure this before you cut anything. With a deep front garden you sometimes cannot make those ten metres at the facade. |
| Art. 5 | 7 | Operating level no more than 2.5 m above or below the road surface | For a home with a high front step or a basement, this is a real limitation. |
| Art. 6 | 1 | Design must not cause confusion with public postboxes | Mainly relevant for DIY builds in orange or red sheet metal. |
| Art. 6 | 2 | Letter slot horizontal, preferably 1.1 m above operating level, no lower than 0.6 m and no higher than 1.8 m | This determines the height of your cut-out. Mark the centre line at 1.1 m and work up and down from there. |
| Art. 6 | 3 | Clear letter opening of at least 265 mm in length and 32 mm in width | Clear means clear: after finishing, with the flap and brush fitted, that dimension must still be there. |
| Art. 6 | 4 | Can be operated without risk of injury | No sharp sheet edges in the cut-out and no pinching spring on the flap. |
| Art. 6 | 5 | Storage space behind the slot at least 270 mm wide, the other two dimensions at least 150 and 380 mm | The 150 mm dimension is why a slim built-in box gets tight in a facade that is only half a brick thick. |
That 150 mm from paragraph 5 is the pivot point for anyone building in. An inner leaf plus cavity plus outer leaf usually achieves that depth, but a single-brick garden wall or a 100 mm brick pier does not. Then the box has to protrude on one side, and you are effectively back to a surface-mounted model sitting halfway into the wall. More on the letterbox requirements themselves in our article on letterbox requirements in the Netherlands.
What does the law say about the parcel compartment? Nothing, and that matters
There is not a single provision about receiving parcels anywhere in the Postregeling 2009. No dimension for a parcel compartment, no requirement for a parcel flap, no minimum opening for a box, no obligation for a delivery driver to put anything in a parcel letterbox. Only the letterbox function is regulated. That is not a detail: it is the whole difference between what you can expect and what you have to decide for yourself.
Two consequences. First: a seller who tells you that a parcel letterbox has to meet a certain parcel size by law is selling you a fiction. That standard does not exist. Second, and more importantly: because the legislator prescribes nothing, your own ordering habits determine the size. You have to decide for yourself which boxes need to fit, because there is no lower limit to fall back on.
It also means that the letterbox dimensions from Article 6 do still apply to your built-in model if it needs to receive post. A built-in model with only a large parcel flap and no slot of at least 265 by 32 mm does not meet the Postregeling for the post function. If you combine both functions in one cut-out, the legal slot dimension comes on top of the clear parcel size you choose yourself. We work out which size that is for you in what size parcel letterbox you need.
There is a third layer underneath. Whether a delivery driver actually puts your parcel in the box is an arrangement between you and the carrier, not a legal right. We cover that in whether PostNL may put a parcel in your parcel letterbox and in what each carrier does. For the built-in question, this is what counts most: you are building a cut-out in concrete or masonry for a function that is not laid down in law anywhere, so the choice of model and size is entirely your responsibility and expensive to correct afterwards.
The sources on letterbox dimensions contradict each other
Four sources, four slightly different numbers. That is exactly why people online mark out the wrong size.
| Source | What the source says | Date | Status |
|---|---|---|---|
| Postregeling 2009, Art. 6 | Opening at least 265 x 32 mm. Storage space at least 270 x 150 x 380 mm. Slot preferably at 1.1 m, between 0.6 and 1.8 m. | Version applicable from 1 July 2026 | This is the law. This is what you follow. |
| PostNL flyer "Waar moet jouw brievenbus aan voldoen?" (What must your letterbox comply with?) | Opening at least 26.5 cm wide and 3.2 cm high, height 110 cm, at least 15 cm deep with a recommendation of at least 25 cm, maximum walking distance 10 metres, no steps higher than 2.5 metres. | Flyer from the carrier itself | Follows the law, but adds a 25 cm depth recommendation that is not a requirement. |
| ACM ConsuWijzer | Receiving space at least 27 x 15 x 38 cm. | Amended 29 July 2025 | Same numbers as Article 6(5), rounded to centimetres. |
| Gamma DIY advice on a letterbox in a door | Gives 26.4 cm as the minimum slot width. | DIY advice | One millimetre below the legal 265 mm. Use 265 mm. |
The difference between 264 and 265 mm sounds like nitpicking until you realise that you cut to within a millimetre and that the finishing trim then takes another few millimetres off your clear opening. Mark out 265 mm as the absolute minimum and preferably allow a little extra for a cut-out, because larger is always allowed.
Surface-mounted, flush-mounted or through-wall: which mounting type suits your wall?
There are three ways to get a post facility onto a wall, and they differ not in style but in the building work involved. Mix these three up and you buy the wrong model or have a contractor make a hole that was not needed.
Front retrieval, in German Entnahme von vorne, means you take the post out at the front. With surface mounting and flush mounting this is in principle the only option, because the wall is not broken through. Rear retrieval, Entnahme von hinten, belongs to a through-wall model where a shaft runs right through the wall or pier. Gate and fence boxes offer both options, because a fence is by definition thin enough to go through. This classification comes from Cenator, which describes the characteristics of both retrieval directions. Which retrieval side suits your wall, with cut-out sizes per brand, is covered in rear or front retrieval.
Logixbox sums up briefly why people want that through-wall option: you do not have to walk round and you are not standing in the street, you take the parcel out in your own garden. That is a genuine comfort argument, especially in the rain and especially if your box is on a busy pavement. It is also the argument that brings the most building complications, because only with this type does a hole go all the way through your facade.
| Mounting type | What happens to the wall | Retrieval | What to watch |
|---|---|---|---|
| Surface-mounted | Only fixing holes in the masonry | Front retrieval | Wedge anchor plugs only where there is at least 5 cm of brick around the hole. Never on the top or side of a low wall. |
| Flush-mounted, recessed | Niche chiselled out or left open, wall stays closed | Front retrieval | A lintel may be needed above the niche. The depth of the niche must accommodate the 150 mm storage space from Art. 6(5). |
| Through-wall (Mauerdurchwurf) | Shaft right through the wall or pier | Rear retrieval | The finished wall thickness determines whether the model fits. Thermal bridging and watertightness become real design questions here. |
| Gate or fence | Cut-out in the panel or between the posts | Front or rear retrieval | No structural wall, but the rules for boundary fences and the stiffness of the panel do apply. |

What cut-out size do you need?
The honest answer: we cannot give you one, and neither can anyone else, as long as you have not chosen the model. Dutch manufacturers do not publish cut-out sizes or a minimum or maximum wall thickness. What they do publish are outer dimensions. If you find a table of cut-out sizes online that supposedly fits every brand, you are looking at something somebody made up.
The rule of thumb that does hold consists of three rules. First: the cut-out is the outer dimension of the model plus clearance. For the through-wall models from Briefkasten-Manufaktur, that clearance is about 10 mm per side. That is a brand-specific figure, not a standard, so do not use it for another brand. Second rule: the manufacturer's drawing is leading. Ask for that drawing before a single brick comes out, not afterwards. Third rule: the finished wall thickness determines whether through-wall mounting with rear retrieval is possible at all.
That third rule is the one most often applied wrongly. Briefkasten-Manufaktur states explicitly that the starting point for the cut-out is the finished wall or pier thickness, including plaster or facade finish, and therefore not the shell dimension. If you measure on the bare shell and then 15 mm of plaster is added on the inside and a facade finish on the outside, your through-wall model will not reach far enough and the trim on one side will not fit flush.
Another detail that is rarely mentioned: the same manufacturer does not allow the box to be glued in directly. The model must remain removable. That makes sense when you consider that a lock, a flap or a hinge will need replacing one day, but it clashes with the reflex of many plasterers to set everything in tightly and finish it off.
A real built-in model for a sense of scale
To show the order of magnitude you are dealing with, here are the dimensions of an existing through-wall model with rear retrieval. The Logixbox Frontbox-Inbouw-Achteruitname has an outer dimension, excluding frame, of 920 by 415 by 430 mm, measured as height by width by depth. The parcel space is 325 by 350 by 400 mm and holds 158 litres. The model weighs 23 kg, is made of galvanised steel with Qualicoat Class 2 powder coating, has a three-point butterfly lock and an optional second frame for finishing on both sides. Brievenbusdirect lists this model at €509.
That 430 mm depth is the number to pause on. It means you need a finished wall or pier thickness of that order before a through-wall model with rear retrieval comes out neatly on both sides. A brick pier next to a driveway often makes it. A cavity wall sometimes does. A single-brick garden wall does not, and then through-wall mounting is simply not an option.
WHAT THE LAW REQUIRES VERSUS WHAT A BUILT-IN MODEL OFFERS
Postregeling 2009 Art. 6(3) and 6(5). Model dimension: Logixbox Frontbox-Inbouw-Achteruitname, outer dimension excluding frame.
Can your wall take it? Lintel, load-bearing walls and a structural calculation
A cut-out in a wall is a hole in something that carries weight. With a load-bearing wall, a structural calculation is essential. That is not a formality you can skip because the hole looks small: DIY work on structural elements is not covered by insurers. If the facade cracks a year later, you are on your own. Temporary propping during the work is also a separate cost item and not part of the hourly rate.
Here we run into a gap in the sources that you will not see honestly named anywhere else: there is no Dutch source that says from what cut-out width a lintel is needed. That is a judgement for the structural engineer, given the type of brick, the bond, the load above the opening and the remaining pier next to the hole. Anyone who gives you a fixed number is making it up. With a load-bearing exterior wall, assume a lintel will come into play and have it checked.
For the fixing itself, Logixbox has a rule in its mounting FAQ that you can rely on: only use wedge anchor plugs where there is at least 5 cm of brick around the hole. And: never mount on the top or side of a low wall, because the brick breaks out there. That is exactly the spot where people instinctively drill, namely the end of a low garden wall next to the driveway.
What to measure before you cut anything
- Determine whether the wall is load-bearing. If in doubt: structural engineer. According to Verbouwstart, a structural calculation costs €400 to €800.
- Measure the finished wall thickness, including plaster and facade finish, not the shell dimension.
- Ask the manufacturer for the model's cut-out drawing and compare it with your measured thickness.
- Check whether the 270 by 150 by 380 mm storage space from Art. 6(5) fits within that thickness.
- Measure the walking distance to the boundary of the road. More than ten metres is not allowed.
- Check that the operating level stays within 2.5 m above or below the road surface.
- Check where pipes and cables run before the saw goes in.
How to build it in: the step-by-step plan
For a slot in a door or a thin panel, the method is well documented. Gamma describes that route in its DIY advice for a letterbox in a door, and the same sequence works for a fence panel. For a hole through masonry, the structural part described above comes on top.
- Measure 110 cm from the bottom and mark the centre point. That is the preferred height from Art. 6(2).
- Mark out the slot. Use 265 mm as the minimum length, not the 26.4 cm that Gamma gives.
- Drill holes in three of the four corners of the marking, with an 8 mm wood drill bit.
- Cut out the opening with a jigsaw, from hole to hole.
- Place the letter plate in the opening and mark the screw holes.
- Drill through the screw holes: 6 mm on the inside, 8 mm on the outside.
- Screw the plate in place and check that the clear opening is still 265 by 32 mm after finishing.
The tools Gamma lists are a tape measure, try square, 8 and 6 mm wood drill bits, jigsaw and screwdriver. The Woonvrienden installation guide of 14 April 2026 adds to that list for work on or in masonry: tape measure, spirit level, drill, plugs and anchors, ratchet, rubber mallet, sealant, gloves and safety glasses. The plug for each surface and the tightening torques are in mounting a parcel letterbox.
The same guide names the five mistakes that happen most often: loose paving as a base, the wrong plugs, drill holes that are not vacuumed out, not working level, and poor accessibility for delivery drivers. That last one is the silent killer, because you only notice it weeks later. On soft ground, Woonvrienden recommends a concrete slab or a poured footing as the base. What a delivery driver does when accessibility is not right is covered in why your delivery driver skips your parcel letterbox.
Note. Vacuuming out drill holes is not a side issue. Brick dust in the hole halves the holding power of a plug, and you only notice when the box starts to hang crooked with a full compartment.
Thermal bridging, condensation and watertightness with a built-in box
This is the part most built-in pages skip over. A built-in letterbox can form a thermal bridge. A steel box that goes right through your insulation layer conducts heat to the outside. The result is heat loss, cold interior surfaces and a risk of condensation and mould at high humidity. Bravios describes that mechanism and the measures against it.
What you can do about it, in order of effect. Include the box at the design stage, not when your facade is already closed. Use thermally separating elements where the box passes through the insulation. With external wall insulation, only work with approved ETICS systems. Seal with sealing tapes combined with elastic joint products, not with sealant alone.
And now the honest part. There are no U-values or other figures available for this specific case. There is no Dutch standard that says how much heat loss a letterbox cut-out causes or what thermal break goes with it. We also found no source that compares sealant with a sleeve, and no Dutch manufacturer that publishes ventilation or drainage instructions for a built-in box. Those are three gaps in the available information, and anyone filling them with a number is filling them with an assumption.
On watertightness, a manufacturer itself is clearest. Logixbox writes literally in its mounting FAQ: "It is never completely one hundred percent watertight." That is not sales talk but engineering: a flap has to be able to open, so there is a seam, and a seam in an exterior facade facing north-west gets driving rain. The same source advises facing the letter opening away from the wind where possible and placing it under a canopy if you can.
It is never completely one hundred percent watertight.
Logixbox, mounting FAQ on fitting a wall-mounted parcel box
In practice this means the following for your design. Point the opening away from the prevailing wind direction. Choose a spot under a canopy, roof overhang or porch if there is one. Make sure water that does get in has somewhere to go instead of standing in the box, because a few millimetres of water under a cardboard box ruins the contents just as well as a puddle. And bear in mind that a through-wall box reaches the inside of your home: with front retrieval and surface mounting a leak stays outside, with rear retrieval the hole is on the inside of your facade.
Placing a letterbox in a fence, gate or railing
With a fence, the structural question disappears, but the question about the boundary fence itself takes its place. IPLO, the Dutch government's information point on environmental law, updated those rules on 6 July 2026, and they break down as follows. Technically, a boundary fence up to 2 m is permit-free; above 2 m a building notification is required. In planning terms, a boundary fence up to 1 m is permit-free nationally, and under Article 2.29(j) of the Bbl (Dutch Building Works Decree) that takes precedence over local rules. Up to 2 m you are permit-free in planning terms provided you comply with the environmental plan rules, the fence stands on a plot with an existing main building and it stays behind the front of the main building.
That last condition is the pitfall for a letterbox. You want a letterbox on the street, so in front of the front of the main building. That is exactly where the planning exemption for 2 m stops and you fall back on the national limit of 1 metre, or on whatever your municipality's environmental plan allows. The municipality sets the building rules for boundary fences through the environmental plan. For a listed building, a boundary fence is not permit-free, full stop.
Technically, a fence box is the easiest of the three built-in types. Gate and fence boxes offer both front and rear retrieval, because the thickness of a panel never gets in the way of a through-wall fitting. What you do need to watch: a wooden panel is not stiff enough to carry a full steel box without the fence starting to move. You hang a box like that between posts or on its own frame, and you put the whole thing on a solid base. There is a reason loose paving as a base is at the top of Woonvrienden's list of mistakes.
Do you need a permit for a hole in your facade?
The honest answer is that this is undecided, and anyone who gives you a simple yes or no here is going too far. Here is why, and here is the route you can take.
The nearest framework is Article 2.29 of the Besluit bouwwerken leefomgeving (Bbl), the version applicable from 1 July 2026. That article makes placing a window frame, a frame infill, a facade panel, an insulation board, a fascia or plasterwork permit-free in planning terms when placed in or on the rear facade or on a side facade that does not face publicly accessible areas. That does not apply to the front facade or to a side facade that does face a public area: those fall under the environmental plan, in the so-called bruidsschat (transitional rules) via the permit for an environmental plan activity from Article 22.26.
The nuance that hardly appears anywhere: strictly speaking, a cut-out for a letterbox is not a window frame and not a facade panel. Not a single source states explicitly that a letterbox cut-out falls under Article 2.27 or 2.29 Bbl. So treat this rule as the nearest framework and not as a settled classification. That is an essential difference, because if your alteration does not qualify as a window frame, you fall back on the environmental plan, even at the rear facade.
For a listed building, the picture is clear. For a rijksmonument (national listed building), the permit requirement applies under Article 5.1(1)(b) of the Omgevingswet (Environment and Planning Act). The permit-free cases are in Article 13.11 of the Besluit activiteiten leefomgeving and only cover ordinary maintenance without changing detailing, profiling, design, colour or material. A new cut-out in a listed facade is by definition an alteration and therefore does not fall under that exemption. The assessment rule is in Article 8.80 of the Besluit kwaliteit leefomgeving, and the competent authority is usually the municipality under Article 18.2 of the Omgevingswet. Municipal and provincial monuments go through the environmental plan and the provincial ordinance respectively, and these differ per municipality. Article 2.30 Bbl also makes clear that for monuments and for a nationally protected townscape or village view, a permit is required unless colour and type of material remain unchanged.
So the safe line is: a question to the municipal Omgevingsloket for each case, especially for a front facade. That costs you an email and a week's wait, compared with a hole you cannot undo. IPLO updated the page on window frames and facade panels on 20 November 2025 and the monuments page on 29 December 2025.
Renting? Or part of an owners' association (VvE)?
Then the permit question is not your first question. Your first question is whether you are allowed to cut into someone else's facade at all.
Tenants and Article 7:215 of the Dutch Civil Code
Article 7:215(1) of the Burgerlijk Wetboek (BW, Dutch Civil Code) says the tenant is not entitled to change the layout or appearance of the rented property without the landlord's written consent. Exception: changes that can be undone at the end of the tenancy without significant cost. A hole in a facade does not fall under that, because bricking it up and refinishing it costs money.
Paragraph 2 looks favourable for tenants of residential property: the landlord grants consent within eight weeks in any case if the change does not harm the lettability and does not lead to a loss of value. But then read paragraph 6. It states that the preceding paragraphs cannot be deviated from to the detriment of the tenant, unless it concerns the exterior of rented residential property. A facade cut-out is exterior. So your landlord may make stricter arrangements there than the legal minimum, and those arrangements are usually simply in your tenancy agreement or in the general conditions.
In practice: ask in writing, describe the model and the cut-out size, and keep the answer. A surface-mounted or freestanding model removes this whole discussion, because it does not permanently change the appearance of the rented property.
VvE: the meeting, not the board
In an apartment complex, the facade is a common area. Article 9(2) of the Modelreglement 1992 (the Dutch model regulations for owners' associations) prohibits changes to common areas without the consent of the meeting of owners. Note the word meeting. Consent from the board or the property manager is not the same and is not enough.
That the size of the hole makes no difference is clear from a ruling of 16 February 2026 described by Groos Advocatuur. It concerned a 50 mm hole through the load-bearing facade for an air conditioner. The court ruled that the consent requirement applies to all changes, regardless of nature or size. Fifty millimetres is smaller than almost any letterbox cut-out, so if that hole needed the meeting's consent, yours certainly does.
If the meeting refuses without reasonable grounds, there is the route of a substitute authorisation under Article 5:121 BW. Always also check the deed of division and the house rules, because these may contain stricter or more specific provisions than the model regulations.
Note. In a VvE, a freestanding model or one placed against the facade is almost always the quickest route, because you are not making a change to a common area. Do check whether the meeting has rules about what may stand in the shared outdoor space.
What does it cost to have a parcel letterbox built in?
There is no source with a total price for exactly this job. What does exist are indications per cost item. We list them below, with the warning you need to read first: the sources disagree about VAT. OfferteAdviseur gives an hourly rate of €35 to €55 for a contractor. On 15 April 2026, Slimster gives, explicitly including 21 percent VAT, a rate of €60.50 to €72.60 per hour for an experienced tradesperson and €78.65 to €96.80 per hour for a contractor or building firm. Those numbers are so far apart that they cannot be measuring the same thing. So for every quote, ask explicitly whether the amounts include or exclude VAT, and never compare a rate from one source with an item from another.
| Cost item | Indication | Source and date | VAT |
|---|---|---|---|
| Contractor hourly rate | €35 to €55 per hour | OfferteAdviseur, updated 10 February 2026 | Not specified |
| Cutting the opening | €150 to €450 | OfferteAdviseur, 10 February 2026 | Not specified |
| Fitting a lintel | €250 to €650 | OfferteAdviseur, 10 February 2026 | Not specified |
| Precast concrete lintel, material | €40 to €150 | OfferteAdviseur, 10 February 2026 | Not specified |
| Steel lintel, material | €60 to €250 | OfferteAdviseur, 10 February 2026 | Not specified |
| Temporary support | €75 to €250 | OfferteAdviseur, 10 February 2026 | Not specified |
| Masonry repair | €120 to €400 | OfferteAdviseur, 10 February 2026 | Not specified |
| Plasterwork | €100 to €350 | OfferteAdviseur, 10 February 2026 | Not specified |
| Waste removal | €75 to €300 | OfferteAdviseur, 10 February 2026 | Not specified |
| Structural calculation | €400 to €800 | Verbouwstart, verified 27 July 2026 | Not specified |
| Fees and permit | €150 to €400 extra | Verbouwstart, 27 July 2026 | Not specified |
| Hourly rate, experienced tradesperson | €60.50 to €72.60 per hour | Slimster, 15 April 2026 | Including 21% |
| Hourly rate, contractor or building firm | €78.65 to €96.80 per hour | Slimster, 15 April 2026 | Including 21% |
| Total, load-bearing exterior wall | €1,200 to €2,500 | OfferteAdviseur, 10 February 2026 | Not specified |
That €1,200 to €2,500 does not yet include the box itself. Add the built-in model: the reference model above is listed at €509 at Brievenbusdirect. And with a permit process, also factor in the lead time, because a dismantled facade does not wait for a decision. What a box itself should cost is set out in what a good parcel letterbox costs.
When building in is not the best route
Work through everything above once and you see the pattern: building in is a construction project. A structural calculation, a lintel, a cut-out you cannot reverse, a thermal bridge you should have dealt with at the design stage, a permit question nobody can answer definitively, and with rental or a VvE, someone else's consent as well. If you want to take that route, the information above lets you prepare it well.
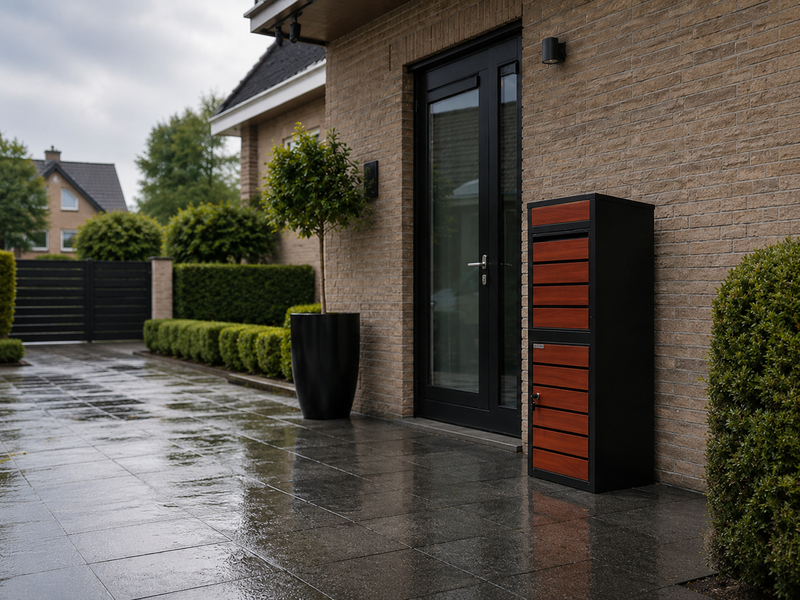
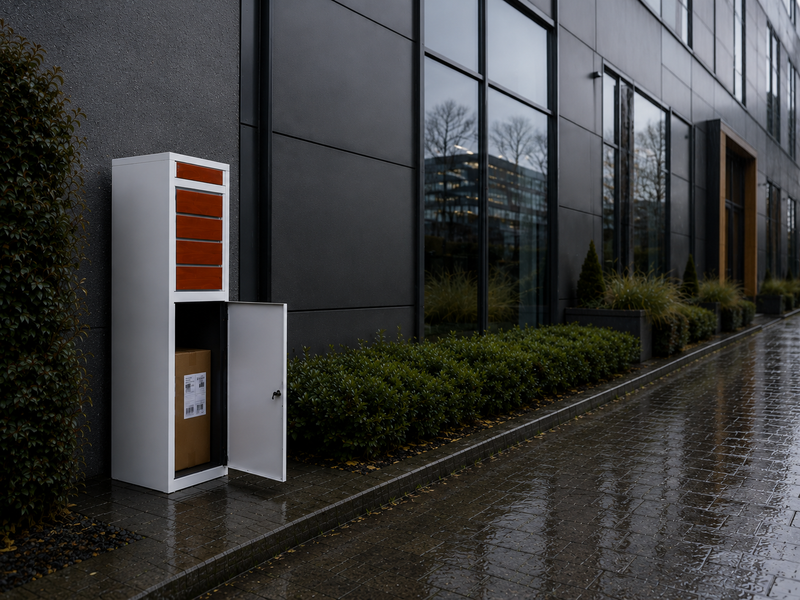
If you do not, there is a strong alternative, and that is exactly what we make. Our models are not built-in models. You place the freestanding models in the garden or against the facade. The Compact hangs on the wall. Either way, you skip the entire built-in process.
- No cut-out in your facade
- No lintel and no structural calculation
- No discussion about Article 2.29 Bbl
- No thermal bridge through your insulation layer
- No consent needed from a landlord or VvE meeting for a facade change
- You take it with you when you move
- A solid base: fix it on paving slabs or in concrete
- On soft ground, a concrete slab or poured footing
- Within ten metres of the boundary of the road, Art. 5(4)
- House number visible, Art. 5(3)
- Slot height between 0.6 and 1.8 m, Art. 6(2)
That moving argument is less trivial than it sounds. Once fitted, a built-in model has become part of the building. A freestanding BunnyBox you unscrew, put on the trailer and set up again at your next home. In a rented house or an apartment, that is the difference between investing in your own things and investing in someone else's property.
The Compact is the answer if you do want to mount on the facade but do not want a hole: a wall-mounted model of 365 by 250 by 450 mm that is supplied pre-assembled. Unpack, hang, done. It is the only series you do not have to assemble yourself, and when mounting on an existing facade that saves you an afternoon. How to hang a surface-mounted wall model on the facade, with the right plug for each facade type, is covered in hanging a wall-mounted model.

Which BunnyBox suits your situation?
The four series differ in what fits inside and where you place them. All series are made of 0.7 mm galvanised sheet steel with Qualicoat Class 2 powder coating with zinc phosphate pretreatment, have a door with a key lock and two keys, and a drop flap on top for the delivery driver. Available in RAL 9005 black, RAL 9010 white, RAL 7036 platinum grey and RAL 7016 anthracite, plus combinations with dark teak or light oak.
| Model | Type | Parcels up to | Outer dimensions | Post and parcels | Packed weight |
|---|---|---|---|---|---|
| Compact | Wall-mounted model, supplied pre-assembled | 300 x 200 x 200 mm | 365 x 250 x 450 mm | Separate slot, 1 compartment | 6.5 kg |
| Style | Freestanding column with wood-effect front | 350 x 320 x 200 mm | 380 x 365 x 1000 mm | Separate slot, 1 compartment | 17.0 kg |
| Home | Freestanding | 370 x 320 x 210 mm | 410 x 380 x 1020 mm | 1 compartment | 16.0 kg |
| Plus | Tall freestanding column | 450 x 320 x 210 mm | 500 x 370 x 1120 mm | Separate compartments | 20.0 kg |
The parcel compartment of a freestanding model is almost half a metre tall. A week's worth of orders fits in it, and that is exactly why a freestanding model works differently in practice from a built-in box you have to empty every day. In the Maximum column, so with tilting as a delivery driver would do, the Home and the Style take fourteen book packages and the BunnyBox Plus eighteen. Four shoeboxes fit in every freestanding model. Phone boxes: nine in the Compact, forty in the Home and the Style, forty-two in the Plus.
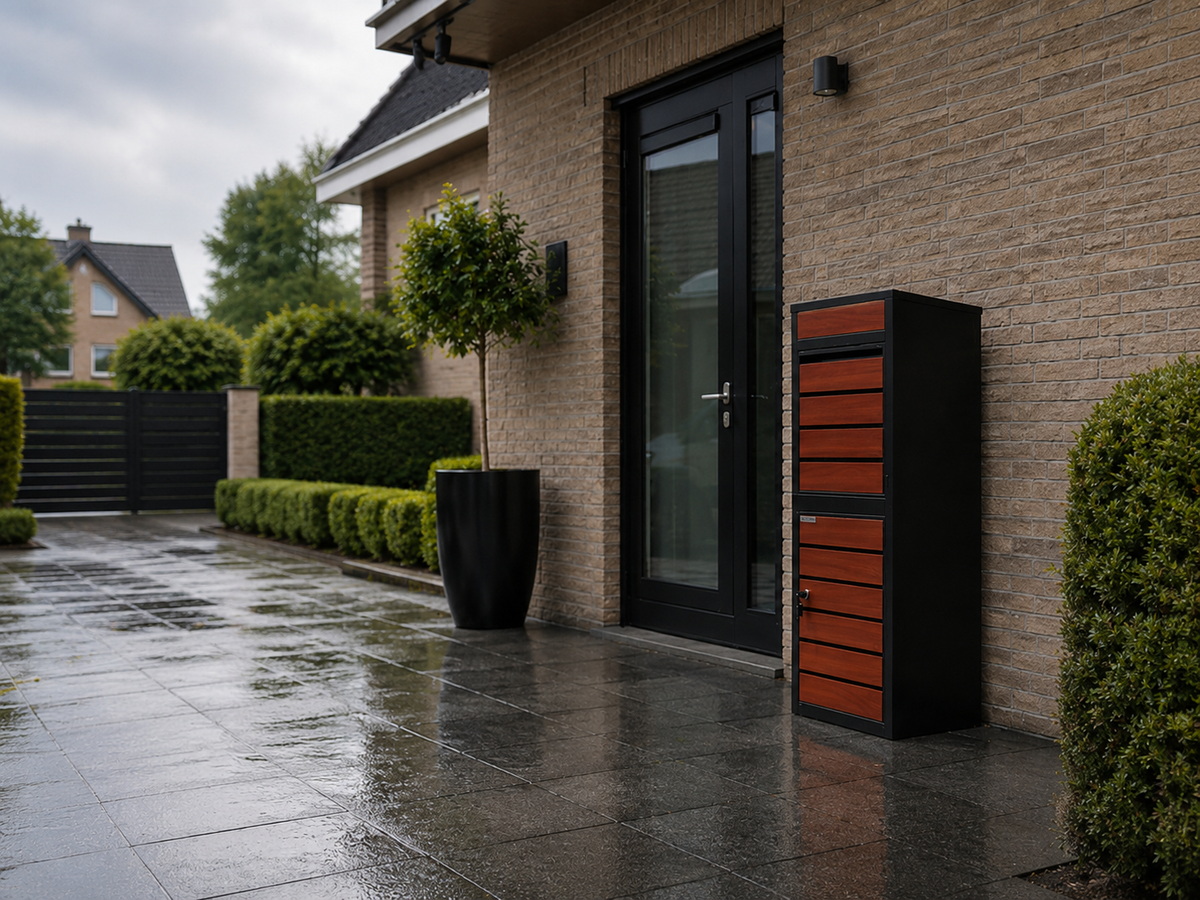
The Plus is the largest of the four: parcels up to 450 by 320 by 210 mm and the only one with separate compartments for post and parcels. That last point is why people who were otherwise looking at a through-wall model end up here: your post and your parcels are kept apart, without anything having to go through your facade. The Home is the freestanding basic model with parcels up to 370 by 320 by 210 mm. The Style has the same freestanding format with a wood-effect front and a separate letter slot, which lets it blend in with a wooden fence or a facade with timber cladding without you having to cut into that fence. Torn between the four? Which BunnyBox suits me will help.


Where do you place a freestanding model so the delivery driver uses it?
The same articles from the Postregeling that you go through for a built-in box also apply to a freestanding model. The difference is that with a freestanding model you simply choose another spot if the dimensions do not work out, instead of opening up your facade again.
Start with Article 5(4): reachable within ten metres of the boundary of a road. In case POS05-0168 of 16 February 2006, the Geschillencommissie (the Dutch Disputes Committee) ruled that even a small overshoot of those ten metres is not allowed. The same ruling clarified what "boundary of a road" means: the line between lawn and verge, not your land registry plot boundary. The concept of a road includes pavements, paths, verges and embankments. For a deep front garden, that often means the box has to move forward, towards the plot boundary, and with a freestanding model that is just a matter of placing it.
Further: slot horizontal and at a height between 0.6 and 1.8 m, preferably 1.1 m above operating level. House number clearly on or near the box. Operating level no more than 2.5 m above or below the road surface, which is a real check for a garden on a slope. And the design must not cause confusion with public postboxes.
For the base, Woonvrienden's advice applies: on soft ground a concrete slab or a poured footing, and never loose paving as a base. Fixing it on paving slabs or in concrete is the standard route. Where possible, point the letter opening away from the prevailing wind and place the box under a canopy if there is one. What goes wrong when the delivery driver cannot find or reach the box is covered in receiving a parcel when you are not home and in our overview of parcel theft in the Netherlands. All knowledge base articles are together in the Knowledge base. Always someone home with a BunnyBox, even when you are not.
View the models
The full range is in the parcel boxes collection.
Frequently asked questions about building in a parcel letterbox
Can I just make a hole in my facade for a letterbox?
Not just like that. On the rear facade or a side facade not facing a public area, Article 2.29 Bbl offers the most favourable framework, but strictly speaking a letterbox cut-out is not a window frame or facade panel, so that framework is not settled. The front facade goes through the environmental plan. Ask your municipality's Omgevingsloket (planning desk) for each case.
Which law sets requirements for my letterbox?
In the Netherlands, the Postregeling 2009, reference BWBR0025578. The Besluit brievenbussen that many sites still quote was repealed on 1 April 2009.
How big does a letterbox slot need to be?
At least 265 mm in length and 32 mm in width, measured clear, according to Article 6(3) of the Postregeling 2009. Gamma gives 26.4 cm, which is one millimetre too little. The height is preferably 1.1 m above operating level, no lower than 0.6 m and no higher than 1.8 m, according to Article 6(2).
What is the difference between front retrieval and rear retrieval?
Front retrieval means taking out at the front and goes with surface mounting and a niche, because the wall is not broken through there. Rear retrieval means taking out at the back and goes with a through-wall model with a shaft right through the wall. Gate and fence boxes offer both.
What cut-out size should I use?
Dutch manufacturers do not publish cut-out sizes. The rule of thumb: the cut-out is the outer dimension plus clearance, the manufacturer's drawing is leading, and the finished wall thickness including plaster determines whether through-wall mounting is possible. Briefkasten-Manufaktur uses about 10 mm of clearance per side for its own models.
How thick does my wall need to be for a through-wall model?
There is no published minimum or maximum value for that. For orientation: an existing through-wall model with rear retrieval is 430 mm deep excluding frame. Measure your finished wall thickness and compare it with the drawing of the model you want.
Is a built-in letterbox watertight?
No, not completely. Logixbox itself writes: "It is never completely one hundred percent watertight." Point the letter opening away from the wind and place it under a canopy where possible.
What does it cost to have a parcel letterbox built in?
For a load-bearing exterior wall, OfferteAdviseur gives €1,200 to €2,500, excluding the box itself. A structural calculation costs €400 to €800 and fees an extra €150 to €400. Check whether quotes include or exclude VAT, because the sources differ on this.
Can I fit a letterbox in the facade as a tenant?
Only with the landlord's written consent, under Article 7:215(1) of the Dutch Civil Code (BW). The favourable rule from paragraph 2 has limited effect here, because paragraph 6 allows deviation where the exterior of the residential property is concerned, and a facade cut-out is exterior.
Do I need consent from the VvE?
Yes, and from the meeting of owners, not the board. Modelreglement 1992 Article 9(2). A ruling of 16 February 2026 about a 50 mm hole through a load-bearing facade confirmed that this applies to all changes, regardless of nature or size. A refusal without grounds can lead to a substitute authorisation via Article 5:121 BW.
Note. Last checked on 25 August 2026. Sources used: Postregeling 2009 (BWBR0025578), version applicable from 1 July 2026, Article 5 and Article 6. Besluit brievenbussen (BWBR0004448), repealed as of 1 April 2009. Besluit bouwwerken leefomgeving Articles 2.29 and 2.30, version applicable from 1 July 2026. Omgevingswet Articles 5.1 and 18.2, Besluit activiteiten leefomgeving Article 13.11, Besluit kwaliteit leefomgeving Article 8.80. IPLO on window frames and facade panels, updated 20 November 2025, IPLO on monuments, updated 29 December 2025, and IPLO on boundary fences, updated 6 July 2026. ACM ConsuWijzer on letterbox requirements, amended 29 July 2025. PostNL flyer "Waar moet jouw brievenbus aan voldoen?". Geschillencommissie, case POS05-0168, 16 February 2006. Dutch Civil Code Article 7:215 and Article 5:121, Modelreglement 1992 Article 9(2), and the ruling of 16 February 2026 as described by Groos Advocatuur. Cenator on front and rear retrieval. Briefkasten-Manufaktur on cut-out and clearance for through-wall models. Logixbox mounting FAQ on fixing and watertightness. Bravios on thermal bridging and condensation with built-in letterboxes. Gamma DIY advice on a letterbox in a door. Woonvrienden installation guide, 14 April 2026. OfferteAdviseur, updated 10 February 2026. Verbouwstart, verified 27 July 2026. Slimster, 15 April 2026. We update this page twice a year and immediately after any change to the Postregeling 2009, the Bbl or environmental plan policy on facade alterations.